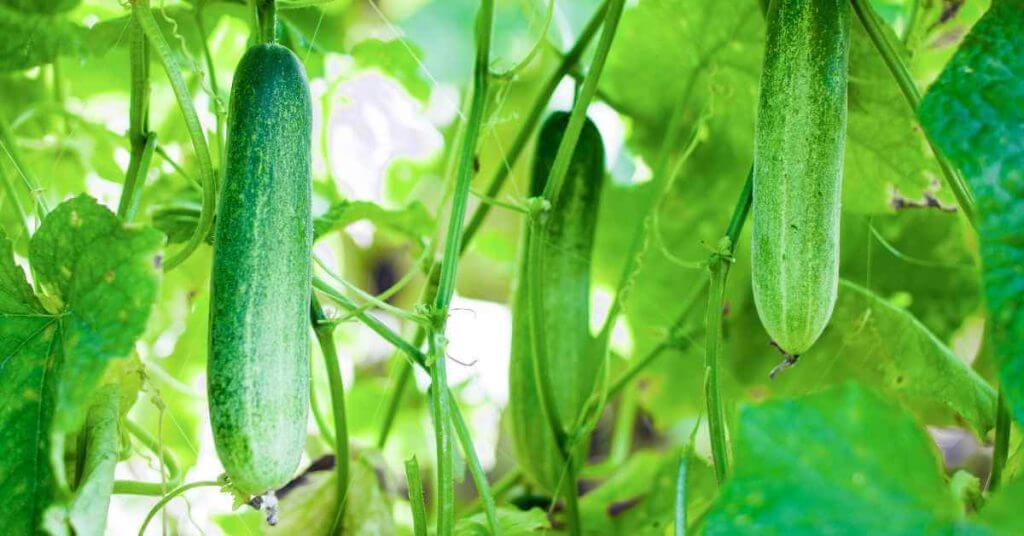
The 5 Best Companion Plants For Cucumbers
Here is a list of the 5 best companion plants for cucumbers that will help your cucumbers, and your garden as a whole, thrive.

Our site features affiliate links. If you buy through them, we earn a commission at no extra cost to you. Thanks for your support!
When it comes to the health and yield of your plants and vegetables, a soil’s pH is often last on the list of checks.
I’ve been there: carefully watering to maintain optimal moisture levels, fertilizing to enrich the soil with nutrients, and spending hours of back-breaking labor to keep the garden weed-free, yet my plants still wouldn’t grow.
If this sounds familiar, a pH check of your soil may well be in order. No matter how much you perfect every other aspect of your soil, none will matter if your soil pH is out of its recommended range. In terms of plant life, pH is often the silent killer.
This article will overview the importance of pH levels in your soil, and how perfect-looking soil can be rendered useless without checking and adjusting for optimum pH ranges. Fortunately, the tests are inexpensive and easy, and fixing pH levels is relatively simple.
The term pH is a little peculiar, but it stands for “potential of Hydrogen” or “power of Hydrogen”, coming from the German words “potenz”, meaning power, combined with the symbol for hydrogen (H). Hydrogen is the key aspect here, as the pH scale measures the concentration of hydrogen ions in a solution, indicating its acidity or alkalinity.
Soil pH is therefore a measure of how acidic or alkaline the soil is. The pH scale runs from 1 to 14, with 7 signifying neutral (for reference, pure water is neutral). Values below 7 indicate acidity, and numbers over 7 indicate alkalinity.
Think of your soil pH like the conductor of a choir, coordinating all of the instruments to play the correct notes at the right time for a beautiful harmony. Without it, your soil will be like a conductor-less band, chaotic and out of tune.
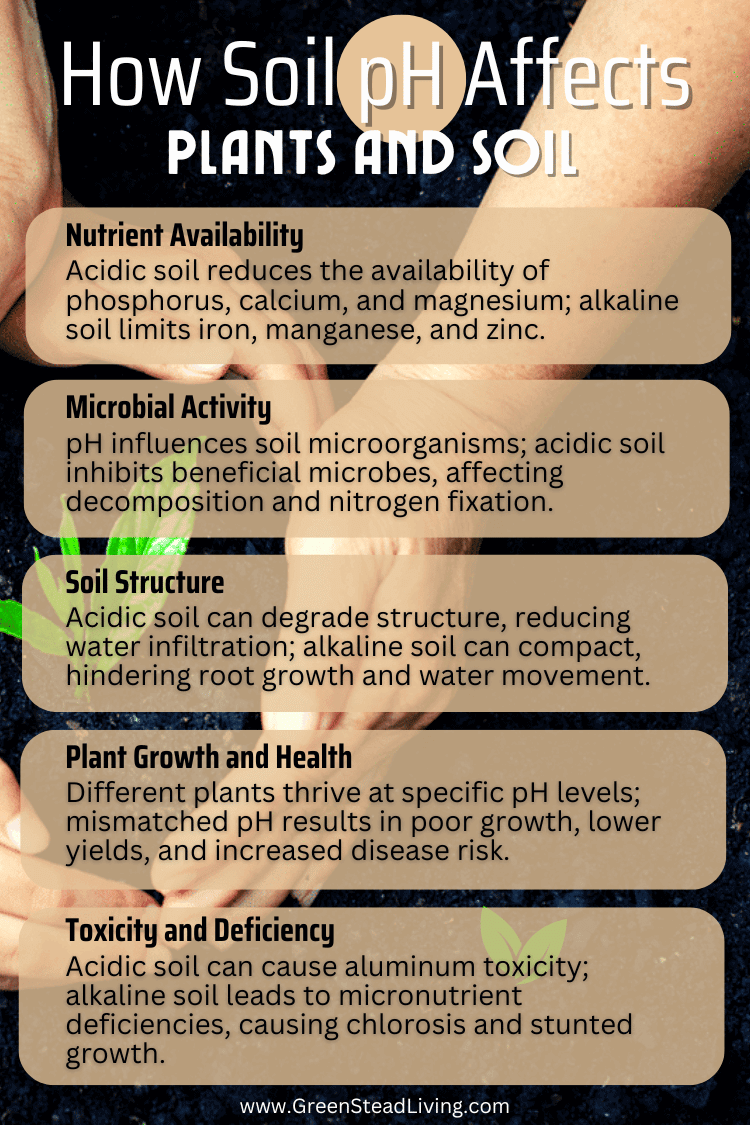
The acidity or alkalinity of soil affects numerous soil functions.
Primarily, pH affects the availability of nutrients and minerals in the soil. It’s not just about having the right minerals and nutrients present; the pH level controls the chemical reactions that determine whether these minerals are accessible to plants.
In low pH (acidic) soils nutrients like phosphorus, calcium, and magnesium become less available to plants. Additionally, toxic metals like aluminum and manganese can become more soluble, potentially harming plant roots.
Conversely, in alkaline soil, nutrients such as iron, manganese, zinc, and copper become less available, leading to deficiencies that cause stunted growth and yellowing leaves.
Secondly, pH affects the activity and population of soil microorganisms. Acidic conditions can hinder the growth of beneficial bacteria and fungi that decompose organic matter and fix nitrogen. On the other hand, alkaline conditions also influence microbial activity, though some beneficial microbes thrive better in slightly alkaline environments.
The measure of acidity or alkalinity in the soil is important because, to be of any use to the plants, nutrients in the soil must be available to them, which means they must dissolve in water. Most nutrients will not dissolve when the soil is either too acidic or too alkaline.
There are three main methods to test your soil: using a home test kit, using a pH meter, or and sending off your sample to a professional lab. Each method has its pros and cons. Some gardeners swear by a fourth way, that they can taste-test their soil like a fine wine. Personally, I haven’t tried it, nor would I recommend it, so we’ll stick with just the main three.
When it comes to soil testing, remember that the accuracy of the test depends on the quality of the sample. A sample that isn’t representative of your garden soil or is contaminated with non-garden materials won’t provide accurate results. For the best outcomes, especially for nitrogen tests, ensure the soil is warm and not too dry or wet.
Avoid collecting samples from unusual areas, such as spots where manure or compost was previously piled, or from depressions where runoff collects. Also, refrain from taking samples within two weeks of adding fertilizers.
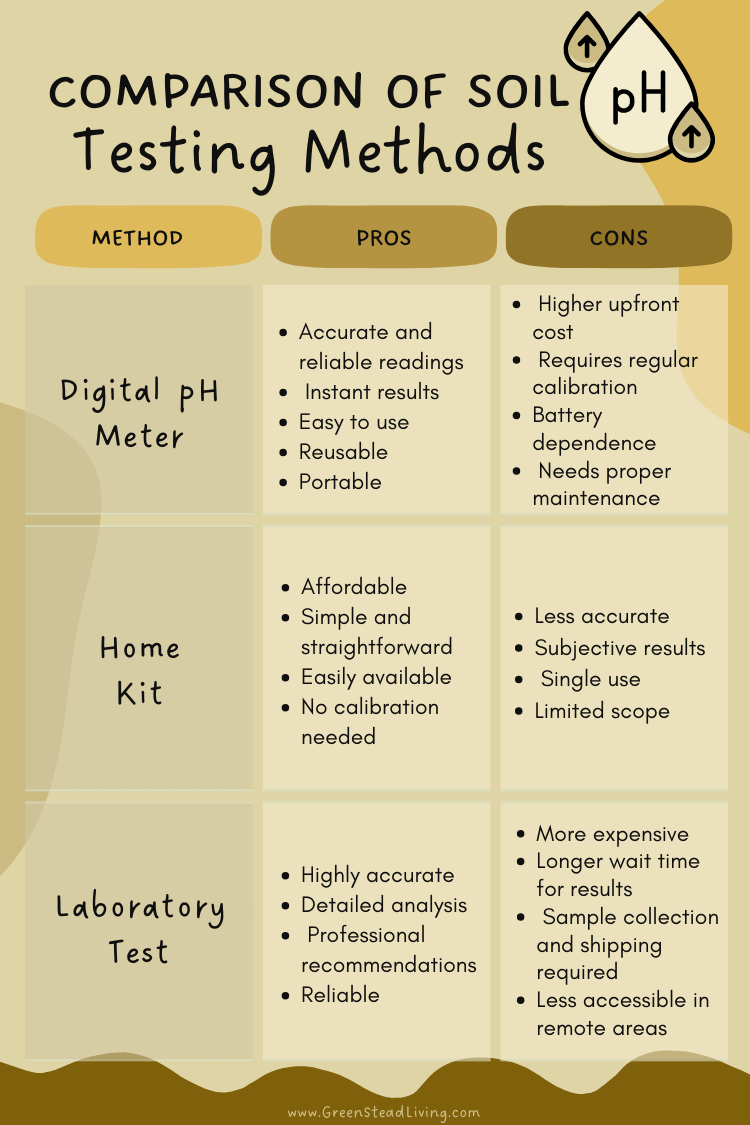
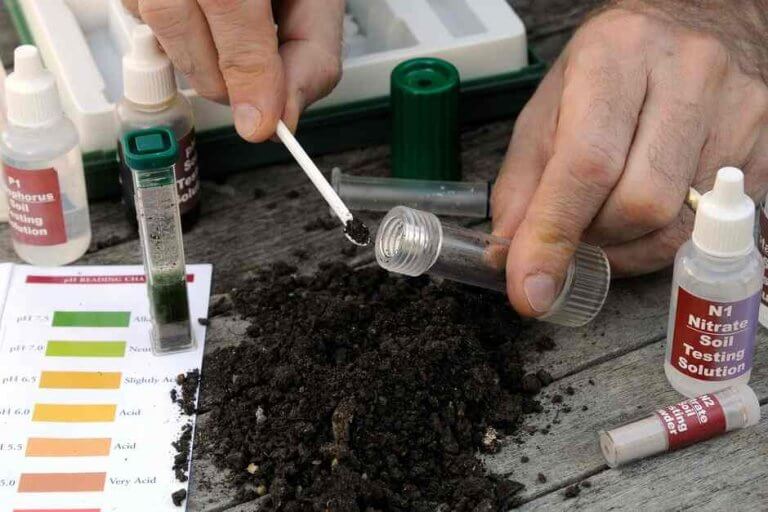
At-home soil pH test kits are the simplest and fastest way to get a fairly accurate reading, at least good enough for most home gardeners.
While the specific instructions may vary depending on the kit you purchase, they generally follow a similar process. Here are the steps I take with a kit I buy here on Amazon.
Pros:
Cons:
In the soil areas you would like to test, dig 4-6 inches deep to get a representative sample of however many samples you wish to test. Place three or four tablespoons worth in a container, you don’t need much. Ensure you don’t take soil samples from unrepresented areas such as underneath a compost pile.
Carefully remove large debris such as rocks, stones, or plant matter, taking care not to contaminate the soil.
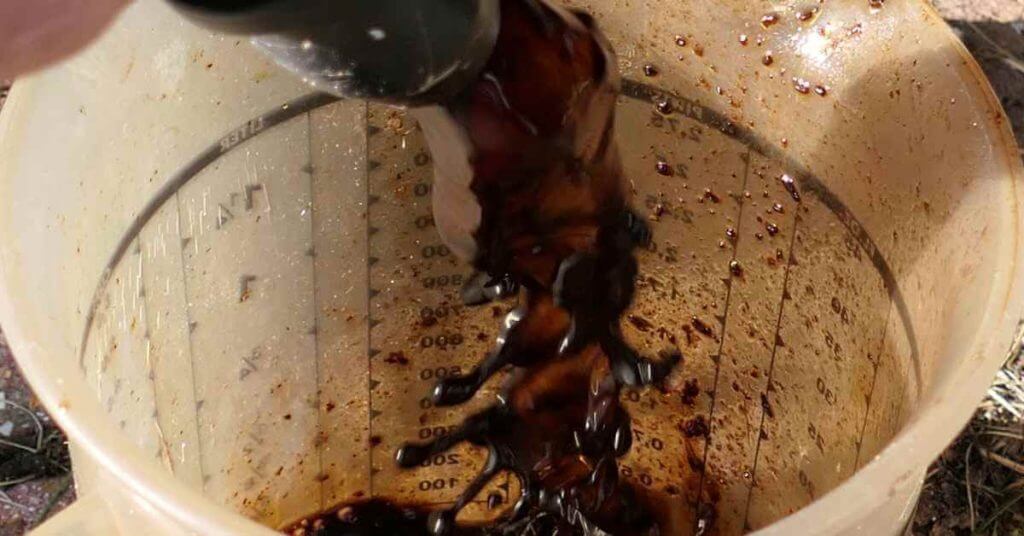
Follow the instructions on your test kit to prepare the soil sample, which usually involves filling the soil sample with distilled water (using tap water can lead to inaccurate results because the water itself may have its own pH level and impurities that can interfere with the test). Fill the distilled water to the same level as the soil and mix it rigorously. Leave the sample to sit for 30 minutes before testing.
Finally, dip the test strip into the soil-water mixture, ensuring you follow the instructions carefully regarding the duration. Once the strip changes color, compare it to the color chart provided on the manufacturer’s packaging to determine the pH level.
While pH test kits such as these are generally cheaper, more straightforward, and faster than most other methods, they can be less accurate than digital meters and laboratory tests, and the results can be subjective based on how you interpret the colors. Still, they are an excellent tool to have on hand and will suit most gardeners’ needs perfectly.
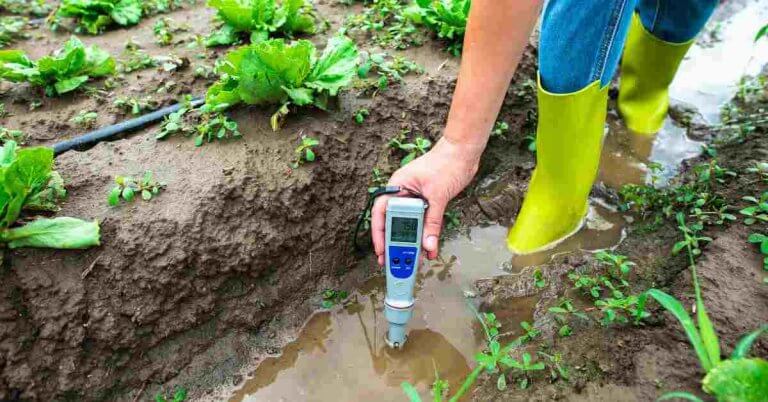
For those looking to get a little more high-tech, pH meters (both digital and analog) are an easy-to-use and convenient way to test your soil pH quickly, although they have some major drawbacks that need to be accounted for.
There are hundreds of cheap pH meters on the market, but having tested many of them, you are far better off buying a higher quality one as the cheap ones are inaccurate from the start and do not last very long before they start to corrode and break down.
I recommend the Apera AI311, which is the best bang for your buck when it comes to pH testers. Unlike most others, this one will last as long as you take proper care of it, such as cleaning it thoroughly with distilled water after each use.
Pros:
Cons:
While you can test your soil in situ using a pH meter, it is more accurate to prepare a small sample in a container.
Remove the first inch of soil as it may contain wood from mulches or whatever covers you may have used and gather small containers worth of soil approximately 6 to 8 inches deep.
You can test these small samples individually if you wish to know your soil pH at different locations, or you can mix as many samples as you like to get a strong average for your garden.
I prefer to take an average, so combine 3 small samples together in one container, remove the larger debris items such as stones, sticks, and plant matter, and mix them.
Add 1.5 ml of distilled water for every gram of soil. If you have 100 grams of soil, for example, add 75ml of distilled water and mix well. Remember, we need a thoroughly moist soil sample to obtain an accurate reading. Let the sample sit for at least 30 minutes before testing.
After 30 minutes or so, mix again and insert your pH meter, allowing the meter to sit for a least 1 minute or whatever the instructions recommend. Once the reading stabilizes, you will have your reading.
Remember to calibrate your meter before use. Calibration differs for all models, so refer to the manufacturer’s instructions for your particular model.
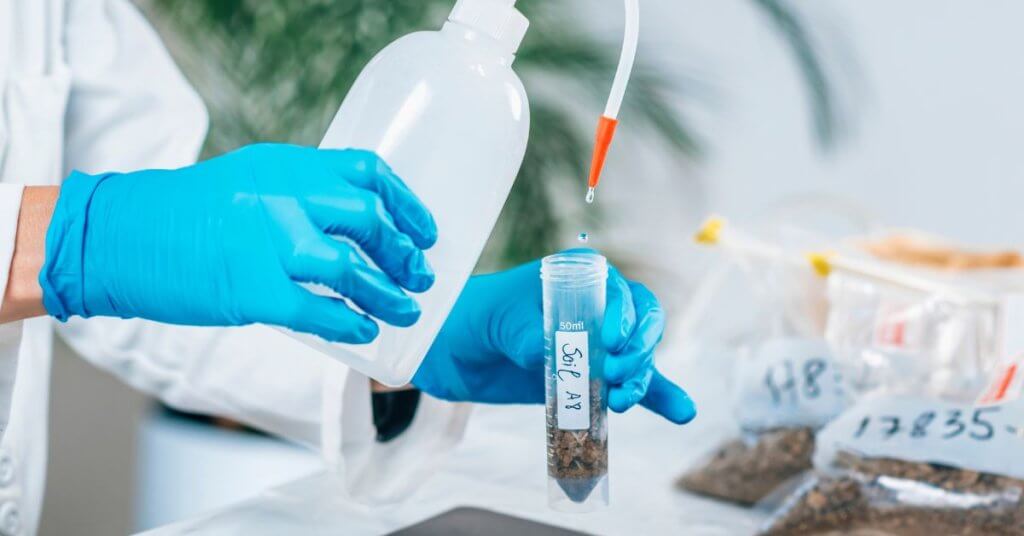
If you’re serious about getting the most accurate result for your garden, laboratory testing is the best way to go.
Pros:
Cons:
Identify the area you want to test and determine the number of samples needed. If you’re looking for a general pH value collect samples from various locations and mix them together to form a single sample.
Use a clean spade or soil probe to collect samples from the top 6-8 inches of soil, which is the root zone for most plants.Remove surface debris like grass, leaves, or rocks before taking each sample.
Break up any clumps and remove stones or large organic matter. If the soil is wet, spread it out on a clean surface to air-dry naturally (do not use heat to try and accelerate drying – it will affect the readings).
Once the soil is dry, mix it thoroughly again to ensure uniformity. Fill a soil sample bag or a clean, sealable plastic bag with about 1 to 2 cups of the mixed soil, or as specified by the lab.
Clearly label the sample with your name, the date, and the sampling location. Complete any required forms from the lab, providing detailed information about the sample and the specific tests you need.
Pack the labeled sample and completed forms securely in a shipping container. Follow the lab’s instructions for sending the sample to ensure it arrives in good condition.
Depending on the time of year you send the sample, the results should come back within 10 business days. While some university places can be as cheap as $20 for a basic analysis, most places will cost around $70 for a full and detailed analysis.
After you’ve tested your soil, you’re left with a bunch of numbers that represent everything from pH to nutrients. What do they mean, and why do they matter?
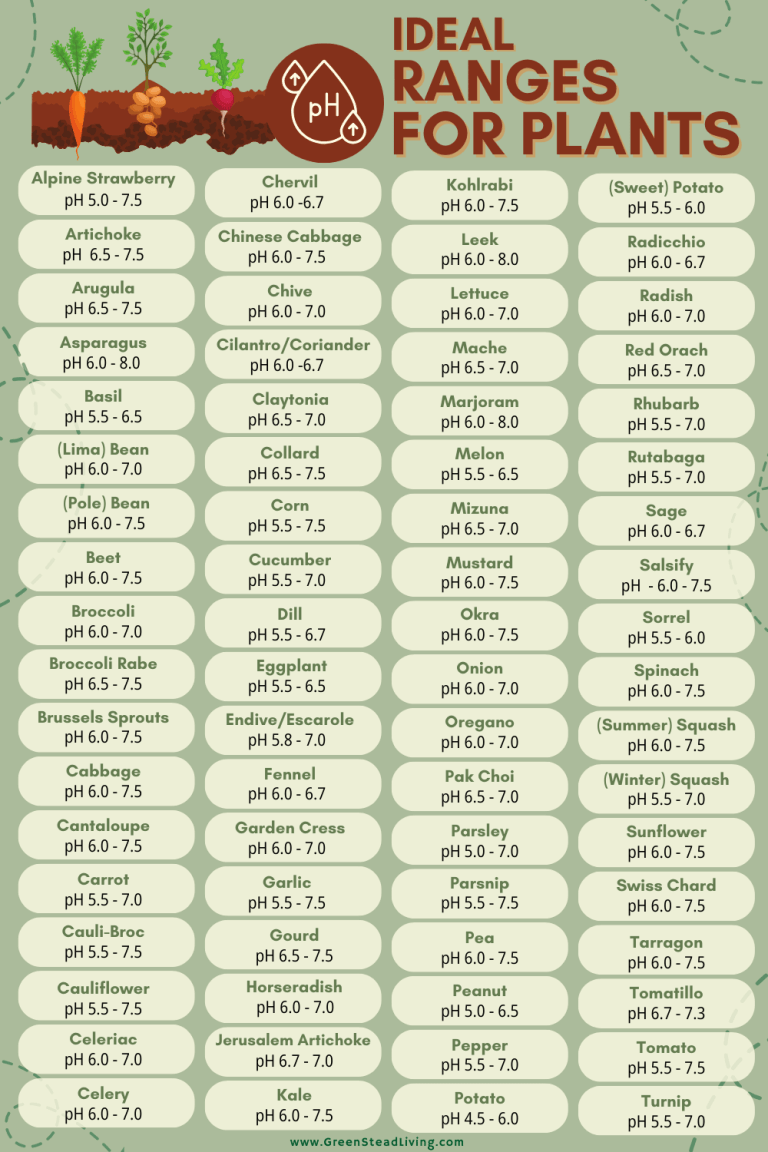
pH Range:
Whether a pH value is good or bad depends on what you’re trying to grow. The table below shows the ideal pH ranges for most common plants. Generally, most plants will grow well with a pH between 6 and 7, although some plants require pH levels outside of this general range.
Testing your soil’s pH is an essential step in ensuring a thriving garden. No matter how much effort you put into watering, fertilizing, and weeding, neglecting pH levels can render all your hard work ineffective. By regularly checking and adjusting your soil pH, you create an optimal environment for nutrient availability and microbial activity, leading to healthier plants and better yields.
Whether you opt for a simple home kit, invest in a digital meter, or send samples to a lab, the insights gained from understanding your soil’s pH can make a significant difference. So, take the time to test your soil, make the necessary adjustments, and watch your garden flourish like never before.
There are three main methods to test your soil: using a home test kit, using a pH meter, or and sending off your sample to a professional lab.
Whether a pH value is good or bad depends on what you’re trying to grow. The table below shows the ideal pH ranges for most common plants. Generally, most plants will grow well with a pH between 6 and 7, although some plants require pH levels outside of this general range.
Using tap water can lead to inaccurate results because the water itself may have its own pH level and impurities that can interfere with the test.
Here is a list of the 5 best companion plants for cucumbers that will help your cucumbers, and your garden as a whole, thrive.

Learn how to start a permaculture garden: an easy beginners guide to creating a sustainable, thriving ecosystem in your own yard.

Reverse osmosis water filtration systems offer the best way to obtain clean and healthy tap water for drinking.
Discover the benefits of organic gardening with our guide on how to make compost tea. This simple process enriches soil, promoting plant health.

The differences between grass-fed vs. grain-fed beef are vast. From nutritional value to taste and sustainability, here are the key differences.
Learn how to preserve eggs for long term use, using the age-old technique of water glassing.