How to Make Compost Tea In 6 Simple Steps
Discover the benefits of organic gardening with our guide on how to make compost tea. This simple process enriches soil, promoting plant health.
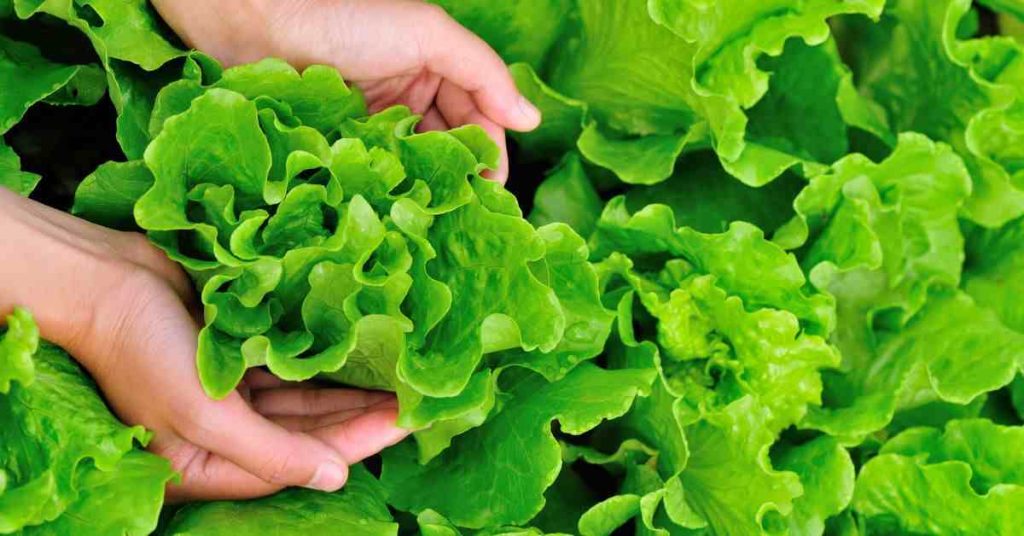
Lettuce is a must-have for every gardener’s plot – It’s one of the earliest crops to flourish in the spring, providing a nutritious, delicious, and abundant supply of leafy greens for many months.
While growing lettuce is relatively easy in most locations, some simple but essential steps must be taken to make your lettuce thrive, increase your harvest, and extend the growing season, ensuring you get the most out of your humble lettuce.
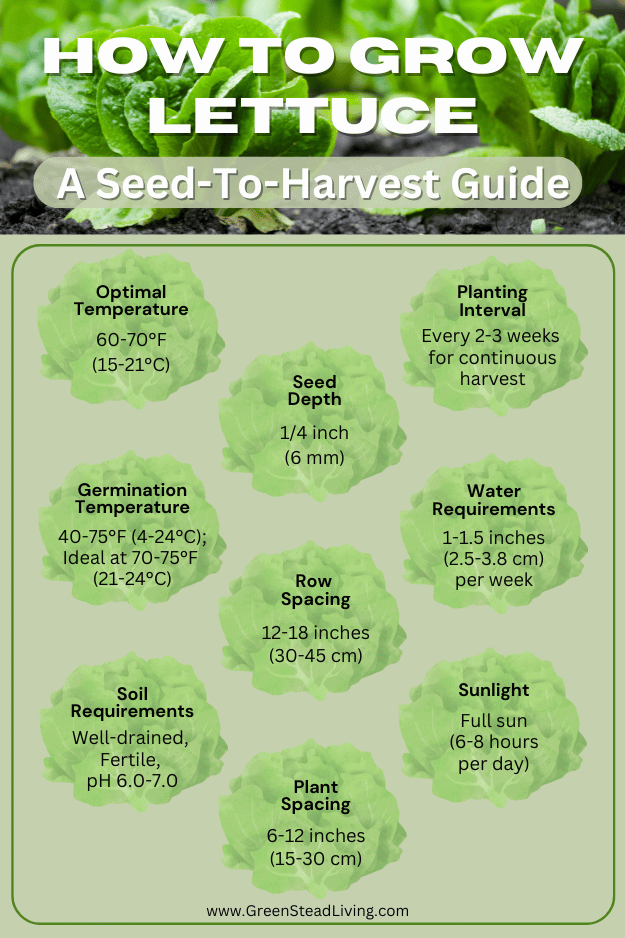
Whether you’re a curious new gardener or a seasoned green thumb, this article will cover everything you need to know about growing lettuce from seeds to harvest. You’ll learn how to get the best bang for your buck and avoid the most common pitfalls. Let’s dive in and make your garden thrive with lush, healthy lettuce.
The success of your lettuce yields is in part determined before you even plant them. Picking the lettuce variety with the best chances of success for your particular growing conditions is essential and well worth the time invested in researching and choosing your varieties.
While lettuce may seem like a simple crop, different varieties create diverse textures, types, and flavors. The seemingly endless varieties are one of the reasons why lettuce remains one of my favorite crops year after year.
For me in zone 8b, Romaine and Buttercrunch are my tried and tested staples, with Buttercrunch providing a soft and slightly sweet taste while complimented by the stronger and slightly bitter flavor of Romaines, which thrive in my warm but wet springtime conditions. I also try to incorporate a third type of lettuce, like some of the more unique Batavarias, for something different.
The table below overviews the most common types of lettuce with their typical characteristics and popular varieties. Start by finding which ones work best in your growing zone, and move to more interesting variants once you’ve got the basics.
Having picked your desired varieties and purchased your seeds, it’s time to get planting. There are two main methods of growing lettuce from seeds – direct sowing and transplanting. While both methods can produce perfectly healthy crops, the decision to sow and transplant depends on when you plan to first seed your lettuce.
As a general rule of thumb, I transplant if planning to grow my lettuce before the last frost date and sow if it is already past the last frost date.
This date is dependent on your region. You can enter your ZIP code into this website here to determine whether to sow or transplant based on average weather data over past years.
Note this is just a rough and ready rule. You can absolutely sow before and transplant after the last frost date, but you will likely have to contend with potential adverse weather, such as frost and low temperatures, that are more likely to affect your crop outside of these dates.
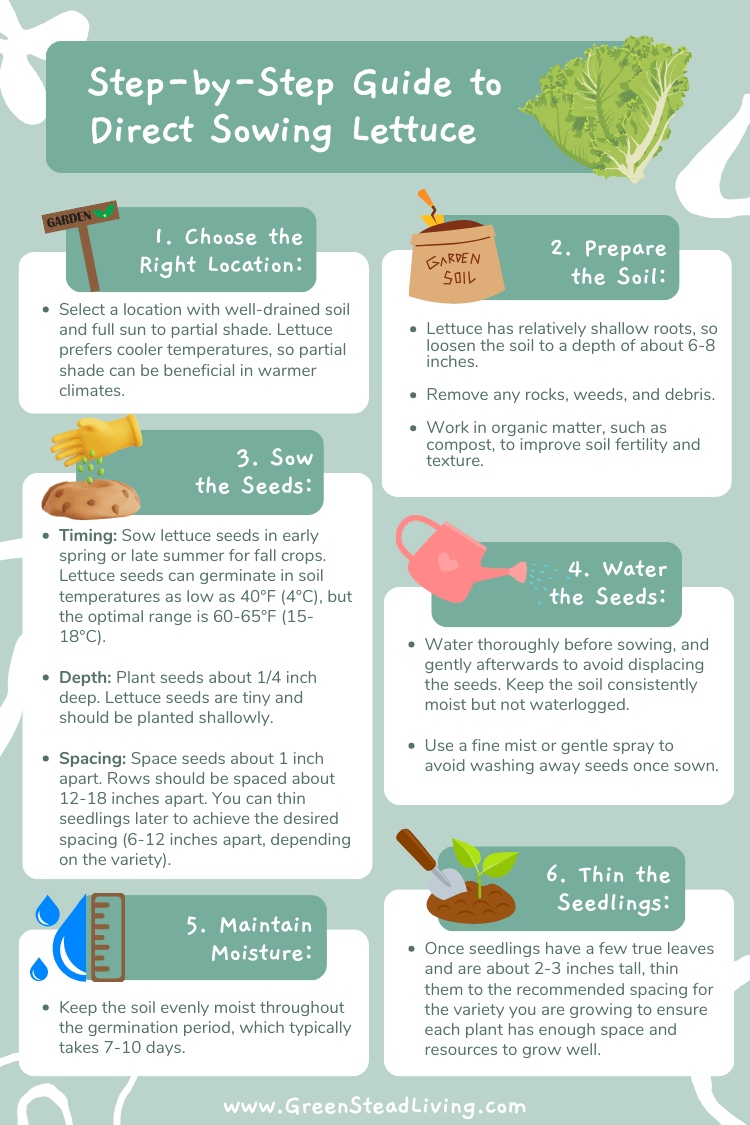
If you’re past your last frost date, or for any other reason have decided the direct sow method is preferred, direct sowing is certainly the easiest, cheapest, and fastest way to plant lettuce seeds.
Direct sowing is the method of planting seeds directly into the soil outdoors where they will grow, rather than starting them indoors or in a greenhouse and having to replant them later.
Sowing lettuce seeds directly into the ground eliminates the need for transplanting, reducing the amount of effort and cost associated with growing seeds indoors and then transplanting them later. Many also find that sown lettuce seeds have stronger root systems since they are not disturbed by transplantation, as they are less prone to shock when being moved from a nice warm environment into the elements.
On the other hand, direct-sown seeds may take longer to germinate outdoors, especially in cooler or inconsistent weather, and the seeds and young seedlings are more vulnerable to pests, diseases, and adverse weather conditions. Germinating temperatures are often higher than growing temperatures, one of the key reasons why most choose to transplant when started early in the growing season.
Direct sowing lettuce is a straightforward process, and in my experience, has a good germination rate so long as you adequately prepare for it.
After this, you can add a layer of mulch to help retain soil moisture and regulate soil temperature. If your soil is not very fertile, apply a balanced, water-soluble fertilizer after thinning to support healthy growth.
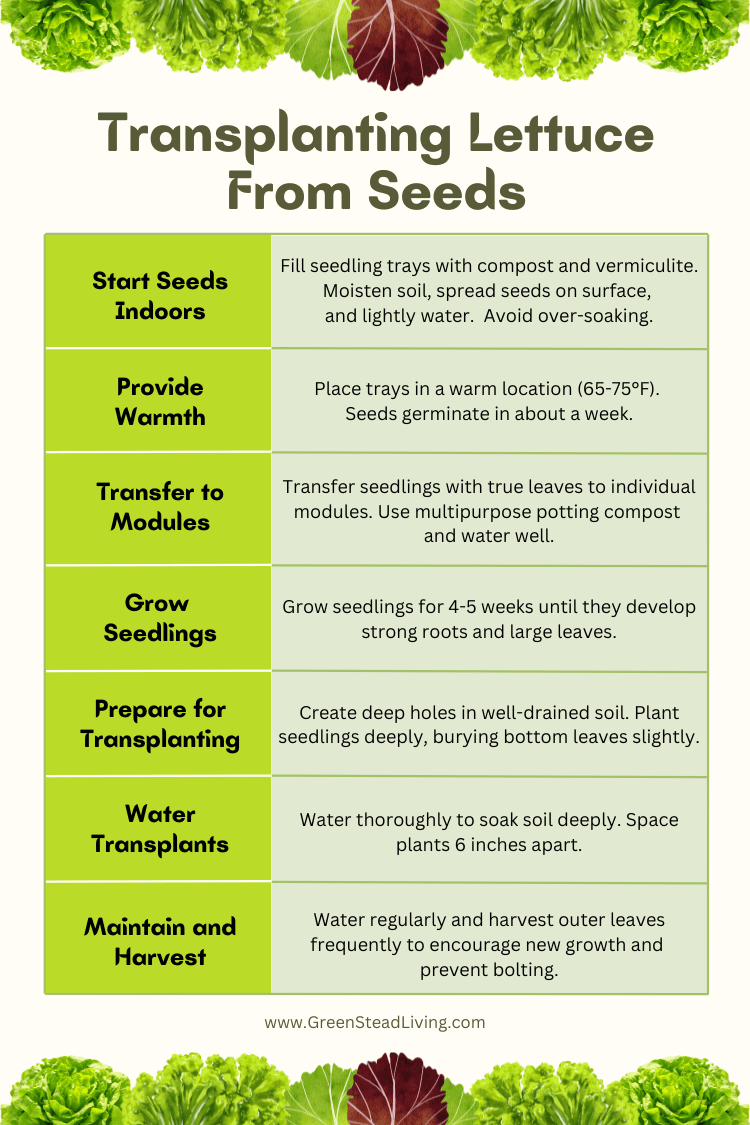
With transplanting, the seeds are started in a controlled environment (indoors or in a greenhouse) and then moved to their final growing location in the garden as young plants (transplants) after they have developed strong enough root systems that are hardy enough to thrive outdoors.
Transplanting involves more work than direct seeding, but you can better control the quality of your lettuce plants and begin growing your crops earlier in the season, perhaps by as much as 4- 6 weeks.
Nowadays, I tend to start as much stuff in module trays as I can, partly because I enjoy the germination process, but also because I can produce extended yields earlier and later into the seasons. I also don’t have to worry as much about the slugs and snails that have demolished my seedlings in the past.
To start, simply grab a seed tray of whatever size you need (you can buy seedling trays from any garden store) and fill it with a composted potting mix. There are dozens of types of soil bags from garden stores, so look for dedicated seed-starting potting mixes designed to support seed growth.
The key to successful seedlings and healthy transplants lies in using vermiculite, a mineral that, when heated, expands into lightweight, absorbent particles commonly used in gardening to improve soil aeration, moisture retention, and seed germination.
The difference between using vermiculite and not is night and day. Lettuce often goes wrong when directly sown because the small and fragile roots cannot drain, get too wet, and begin to rot.
Adding vermiculite (or pearlite or even sharp sand) to composted potting mix is essential for strong seedlings. You will notice a massive difference within a very short period, and your lettuce plants will have a strong head start.
With your vermiculite soil starting mix in your starter tray, water moderately, and ensure the soil is fully moist but not soaking and soggy.
In your composted potting and vermiculite mix, spread your lettuce seeds generously. In theory, every seed is a lettuce. But because seeds are cheap and plentiful, you’ll want to pick out only the strongest. Overseeding will ensure you obtain only the strongest seedlings.
You do not need to cover or bury your seeds, just spread them on top of the potting mix. Water or mist lightly over the top of the freshly planted seeds, taking care not to soak the soil. If you use vermiculite, you can water it slightly once within the germination week to give it an extra boost. If you do not use vermiculite, do not risk watering as it can easily saturate the soil and damage the delicate roots.
Your freshly sown seeds will appreciate some warmth, so a greenhouse or indoor conservatory would be ideal. Even a windowsill at house temperature should suffice.
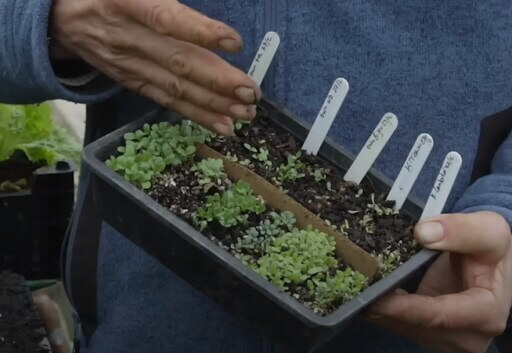
Once your seeds have germinated (it will take approximately a week) and the top leaves are just about showing like in the image below, it’s time to transfer your new seedlings to a module tray where they can grow into larger seedlings that are easily transplantable.
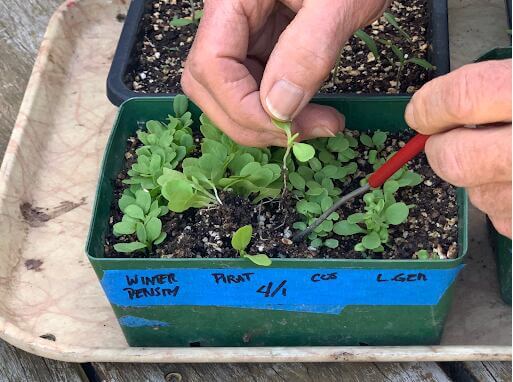
Using a toothpick or a stick, pick out the healthiest-looking seedlings, making sure to gently pull the entire root without damaging it. With the same stick, make a large enough hole in your module tray to place one seedling in each module, repeating for however many lettuces you wish to grow.
When picking out and planting your seedlings, don’t worry about being too delicate. It’s not easy to get the roots in perfectly vertically, so poke them in as best you can. As long as the roots are in the hole you poked and covered with soil, they will find their way just fine. Bury the entire stem of the seedlings to just below the top leaves, leaving just the very top exposed to light.
For your module trays, any multipurpose potting compost is good. Water it well and get it really moist before inserting your seedlings.
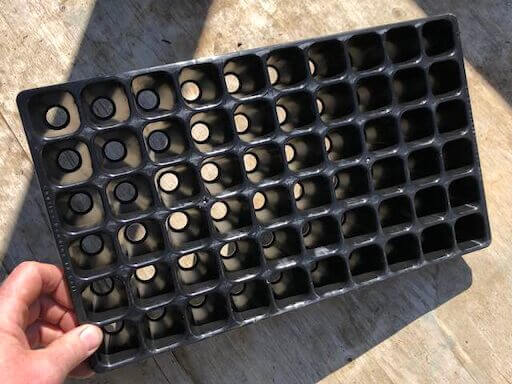
In about two weeks, you will have significant growth with large established leaves. You will want to wait around four weeks for each seedling to have filled the module with roots, at which point they are ready for transplant.
After four or so weeks of seedling growth, you should have large and healthy-looking modules. Note there is no set correct size for transplanting: In my experience, smaller modules tend to root quicker, but larger ones tend to be more resilient to pests, especially slugs. I find 4 or 5 weeks the best time, but transplant earlier if temperatures are high enough, or later if temperatures are still too low.
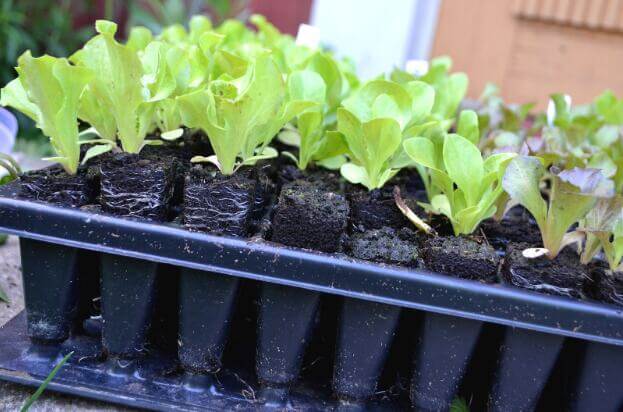
To transplant the lettuce modules into your soil, use a broomstick or the handle of your trail to poke a hole about 2 inches deeper than the height of your soil modules into your garden soil. Remove your transplanted lettuces from their modules and place them into your deep hole (the bottom of the leaves should be below the soil line a little), and lightly but fully fill the soil into the hole, taking care not to over-compact and inhibit root growth.
Finally, water your transplants well. Give them a good covering and wait a few seconds to let the water soak down into the deeper soil. Water again and repeat two or three times, ensuring the deeper layers of soil are getting some water.
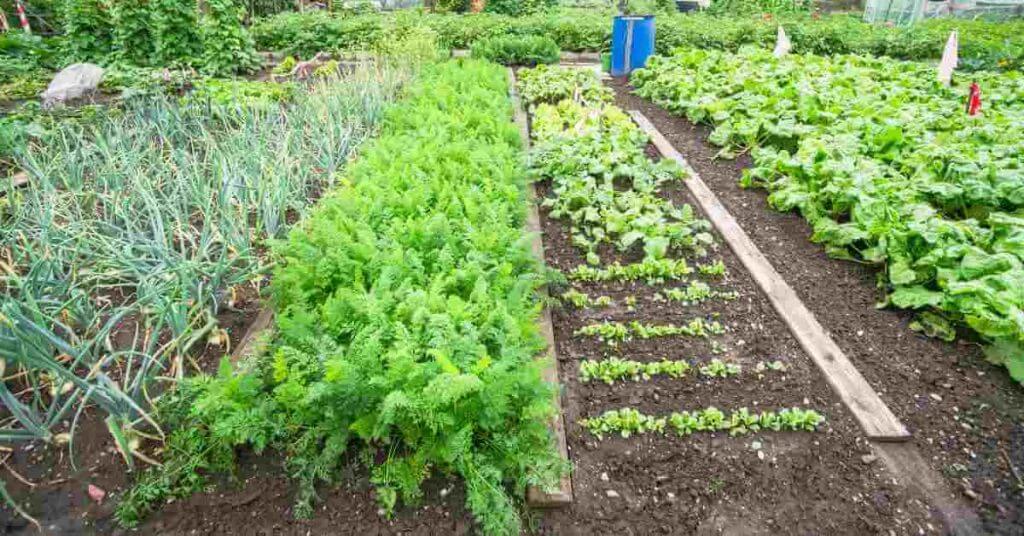
As for spacing, there is conflicting information. Many claim you can successfully grow lettuce very densely to maximize space. While this is true, you can grow lettuce very densely with spacings as small as 2 inches, I do not advise it.
Having tried to grow lettuce densely myself, what these people don’t tell you is the potential for severe pest problems and stunted growth. Romaines are known for their thick ribs, which give them their distinctive crunch, yet the lettuce grown densely was weak and soft. Plus, many of them were filled with slug-munched holes.
As a result, I stick to 6-inch spacings as an adequate minimum. While there is some space between crops, they are all thick, crunchy, highly productive, and usually free from pest issues.
Hopefully, you now have thick, luscious, and fast-growing lettuce. The next step is maintaining their growth for as long as possible, and the key to this is regular and efficient harvesting.
Pick and eat your lettuce leaves as soon as they are ready. It’s important to keep on top of this and harvest your lettuces regularly, otherwise, they may bolt, create a heart, and stop growing any further leaves. Once they have bolted, the leaves become bitter.
The most common way to harvest lettuce is the cut-and-come-again method, where you harvest the outer leaves as they reach a suitable size, leaving the inner leaves to continue to grow. Always pick leaves from the outside – 80 percent of the photosynthesis is performed by the inner layers of leaves, so don’t be shy about picking off too many. If you over-pick, however, it will grow back slower. I pick off the outer leaves once a week, which is just enough time to grow new leaves.
If you prefer growing lettuce for its head (like you can with romaine and buttercrunch), you can choose not to regularly harvest the leaves and instead let it form a head once it reaches maturity.
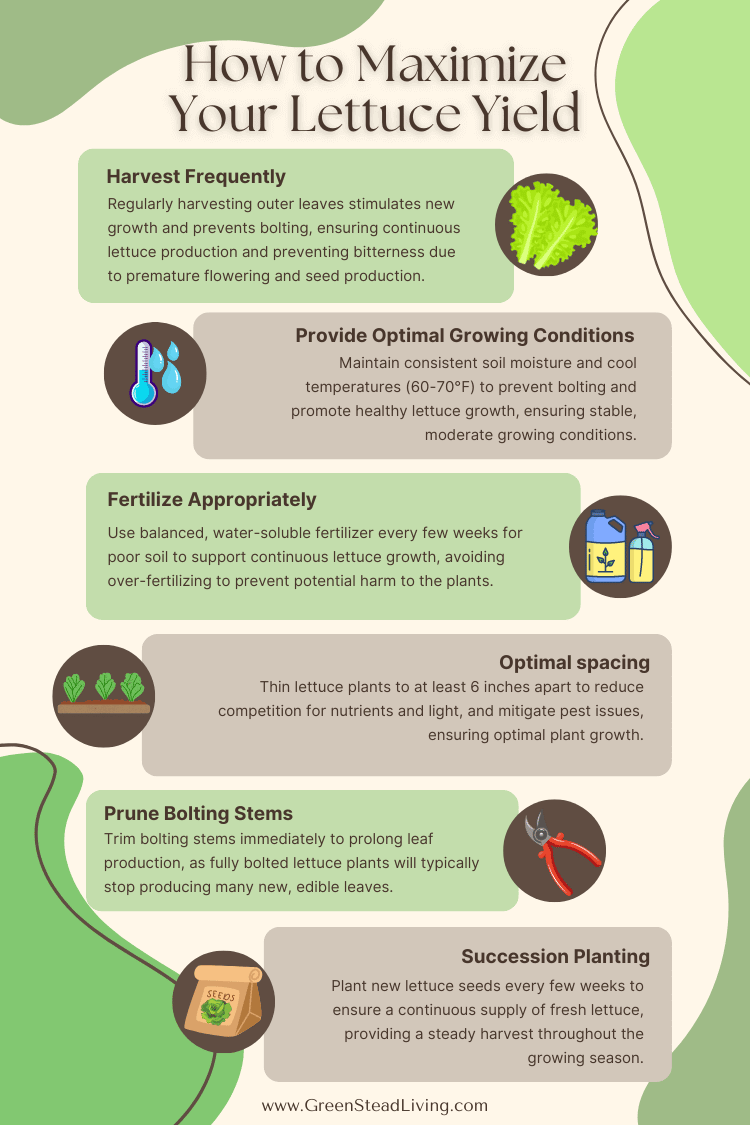
With the basics under your belt, your focus should be on maintaining conditions to maximize your lettuce yield and extend its growing season.
1. Harvest Frequently
Regularly harvesting outer leaves helps stimulate the plant to produce new growth. Remember, 80 percent of photosynthesis occurs in the inner leaves, so don’t worry about removing too many outer leaves.
Regularly harvesting avoids the plant bolting (going to seed), which causes the leaves to become bitter and the plant to stop producing, marking the end of your lettuce’s productive life.
2. Provide Optimal Growing Conditions
Maintain consistent moisture in the soil without overwatering. Lettuce prefers cool temperatures (60-70°F or 15-21°C), so keep the plants in a location with stable, moderate temperatures.
Bolting stems are often the result of the plant getting too hot, so keep your plant shaded in those hotter months. In warmer climates, lettuce can only be successfully grown in the spring and fall – the hotter summer months often cause lettuce to bolt.
3. Fertilize Appropriately
If you have poor soil quality, use a balanced, water-soluble fertilizer every few weeks to provide essential nutrients and encourage continuous growth. Avoid over-fertilizing, as this can harm the plants. Home made compost is another good option.
4. Thin the Plants
If your lettuce is crowded (less than 6 inches apart), thinning the plants to provide enough space for each one to thrive reduces competition for nutrients and light while mitigating slugs and other pests ruining your crop.
5. Prune Bolting Stems
If the plant starts to bolt (sending up a flowering stalk), trim the stem immediately to prolong leaf production. Once the plant has fully bolted, however, it typically won’t produce many more leaves, and the existing leaves become bitter.
Plant new lettuce seeds every few weeks to ensure a continuous supply of fresh lettuce. Known as succession planting, this method ensures that as one crop is finishing, another is ready to harvest.
While a simple, hardy, and relatively straightforward crop to grow lettuce, the success of your yields depends on picking the best varieties for your growing zone and regularly harvesting to extend their growing season.
To get a head start on the growing season before the last frost date, grow your seedlings indoors or in a greenhouse to ensure the best temperatures for germination. If you’re already past your last frost date, you can go ahead and directly sow them for equally strong results.
By harvesting often, managing soil conditions, and planting in succession, you can extend your lettuce season and enjoy fresh, home-grown lettuce for months. Whether you’re new to gardening or a seasoned pro, these tips will ensure you grow a bumper lettuce crop year after year.
To get a head start on the growing season before the last frost date, grow your seedlings indoors or in a greenhouse to ensure the best temperatures for germination. If you’re already past your last frost date, you can go ahead and directly sow them for equally strong results.
By harvesting often, managing soil conditions, and planting in succession, you can extend your lettuce season and enjoy fresh, home-grown lettuce for months.
The most common way to harvest lettuce is the cut-and-come-again method, where you harvest the outer leaves as they reach a suitable size, leaving the inner leaves to continue to grow.
Always pick leaves from the outside – 80 percent of the photosynthesis is performed by the inner layers of leaves, so don’t be shy about picking off too many. If you over-pick, however, it will grow back slower. I pick off the outer leaves once a week, which is just enough time to grow new leaves.
As a general rule of thumb, I transplant if planning to grow my lettuce before the last frost date and sow if it is already past the last frost date. This date is dependent on your region. You can enter your ZIP code into this website here to determine whether to sow or transplant based on average weather data over past years.
Discover the benefits of organic gardening with our guide on how to make compost tea. This simple process enriches soil, promoting plant health.
The ultimate guide to reap the benefits of no-dig gardening, complete with a step-by-step guide on building your own.
Raised beds are an excellent way of gardening for healthy and plentiful fruits and vegetables. Here are the benefits and which type of raised bed might work best for you.

Here are the 5 best companion plants for strawberries, and how each will compliment each other for healthier and more lucrative strawberries.
Growing microgreens at home with trays is the easiest and cheapest method to begin growing a substantial amount of your own food.

Learn about the benefits of beef tallow for skin, from its complement of skin enriching vitamins to its complete fatty acid profile.