Raised Bed Gardening – The Best Way To Grow Vegetables
Raised beds are an excellent way of gardening for healthy and plentiful fruits and vegetables. Here are the benefits and which type of raised bed might work best for you.
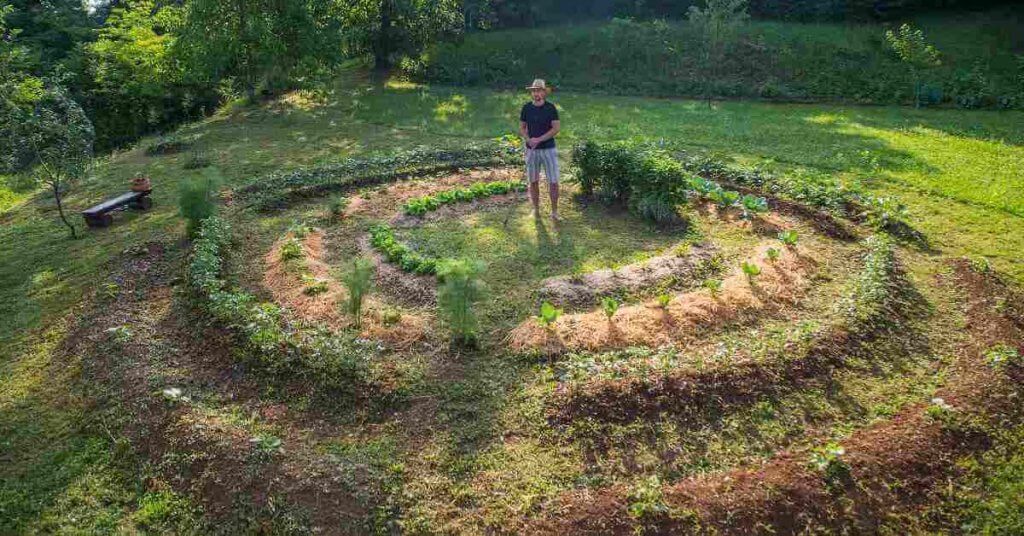
Imagine stepping into a garden where every plant thrives, the air is abuzz with pollinators, and the soil is rich and teeming with life.
This isn’t a scene from a Disney movie but the very essence of what a permaculture garden embodies.
Whether you’re a seasoned gardener looking to deepen your connection with the earth or a novice drawn to the idea of sustainable living, starting a permaculture garden is a journey of discovery, innovation, and profound ecological respect.
In this article, we’ll provide an overview of permaculture and its principles while guiding you through eight easy steps to transform your space, be it a large garden or a small balcony, into a thriving permaculture garden that nourishes both your body and the earth.
Much of the success of a permaculture garden is in the design phase, so the more information you can arm yourself with before breaking ground, the better and more well-balanced your permaculture garden will be.
Let’s start with the basics. Permaculture is a way of designing gardens, farms, and living spaces that work with nature rather than against it.
Whereas conventional planted gardens prioritize aesthetic or productive goals, permaculture focuses on creating sustainable, self-sufficient ecosystems by mimicking natural processes.
The ultimate benefit of permaculture over traditional methods is that it leads to resilient ecosystems and plants that can thrive over the long term, with minimal maintenance, ensuring that you grow resilient and prosperous plants while emboldening local ecosystems.
By extension, permaculture gardening is simply the act of applying the principles of permaculture, such as sustainability and self-sufficiency, to your very own garden.
Because a permaculture garden depends directly on your specific climate, such as sunlight, water, and wind, the design of your permaculture garden is influenced heavily by the pre-existing climate and ecosystem.
The ultimate aim of your permaculture garden is to create a flexible setup where native plants can prosper while also helping boost its local environment.
For example, native flowering plants like milkweed, goldenrod, or sunflowers can attract and bolster ladybug populations due to their nectar, pollen, or habitat structure. In return, the ladybugs will feed on aphids, a common garden pest that can damage a wide variety of plants by sucking sap from their leaves and stems, a win-win for both plant and bug.
Not only does this help strengthen plants and insects, it highlights the true philosophy of permaculture gardening – taking care of your microclimate so it takes care of you. As a result, you will yield healthier plants that need less input and maintenance.
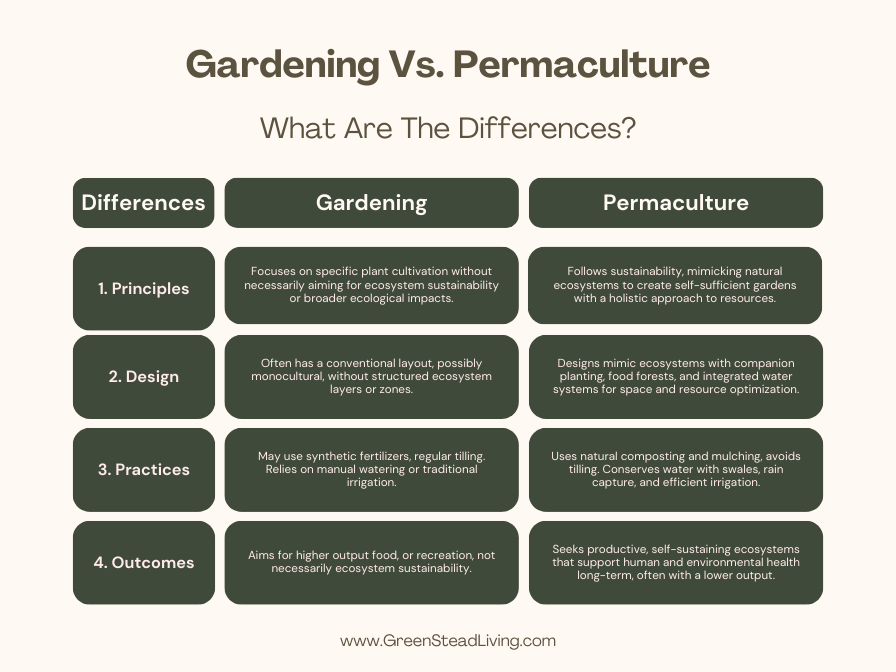
While permaculture and conventional gardening both aim to cultivate plants, including vegetables, fruits, and ornamentals, they differ significantly in philosophy, design principles, and practices.
Conventional gardening, such as monoculture (planting a single type of crop over a large area) and square-foot gardening (where garden space is divided into square-foot sections, each planted with a different crop), tend to have a one-size-fits-all approach. Although they are often quite productive, they are not so natural.
In contrast, a permaculture garden is more diverse and flexible, albeit often with lower yields. They are often easier to maintain, however, by taking advantage of natural conditions like the sun, wind, and water, working with you instead of against you.
The plants you choose will likely differ as your focus will be on promoting biodiversity or choosing plants that require more or less water depending on your area’s precipitation. In conventional gardening, however, your choice of crops may be based on which crops grow the biggest and fastest.
You will focus on building healthy soil naturally through composting, mulching, and no-till practices, such as no-dig gardening, as opposed to relying on chemical fertilizers and pesticides to enhance plant growth and control pests.
Permaculture gardening grants you considerable freedom and flexibility, providing a comforting assurance that there’s no strict right or wrong way to approach it. The downside to this is that it provides a myriad of choices that overwhelm almost every beginner. Trial and error plays a large part in permaculture gardening and thus requires a lot of patience.
Permaculture principles can be adapted to any size space, from a large homestead to a small balcony. The key is to understand and apply the core concepts of permaculture—such as efficient use of space, creating ecosystems, and maximizing resources—rather than focusing on the size of the garden itself.
While it may take at least a couple of acres to produce the majority of your own food, a balcony can still provide a few vegetables or fresh herbs that can add to the quality of your life and your environment.
Smaller areas, such as balconies, can take advantage of other methods such as vertical gardening, companion planting, and container gardening to maximize efficiency. Over time, as you learn and grow, your yields will become increasingly more efficient.
No matter the size, a permaculture garden is about making the most of what you have and creating a sustainable, productive space. Starting small and focusing on quality is always best, and as you learn more, your garden will grow.
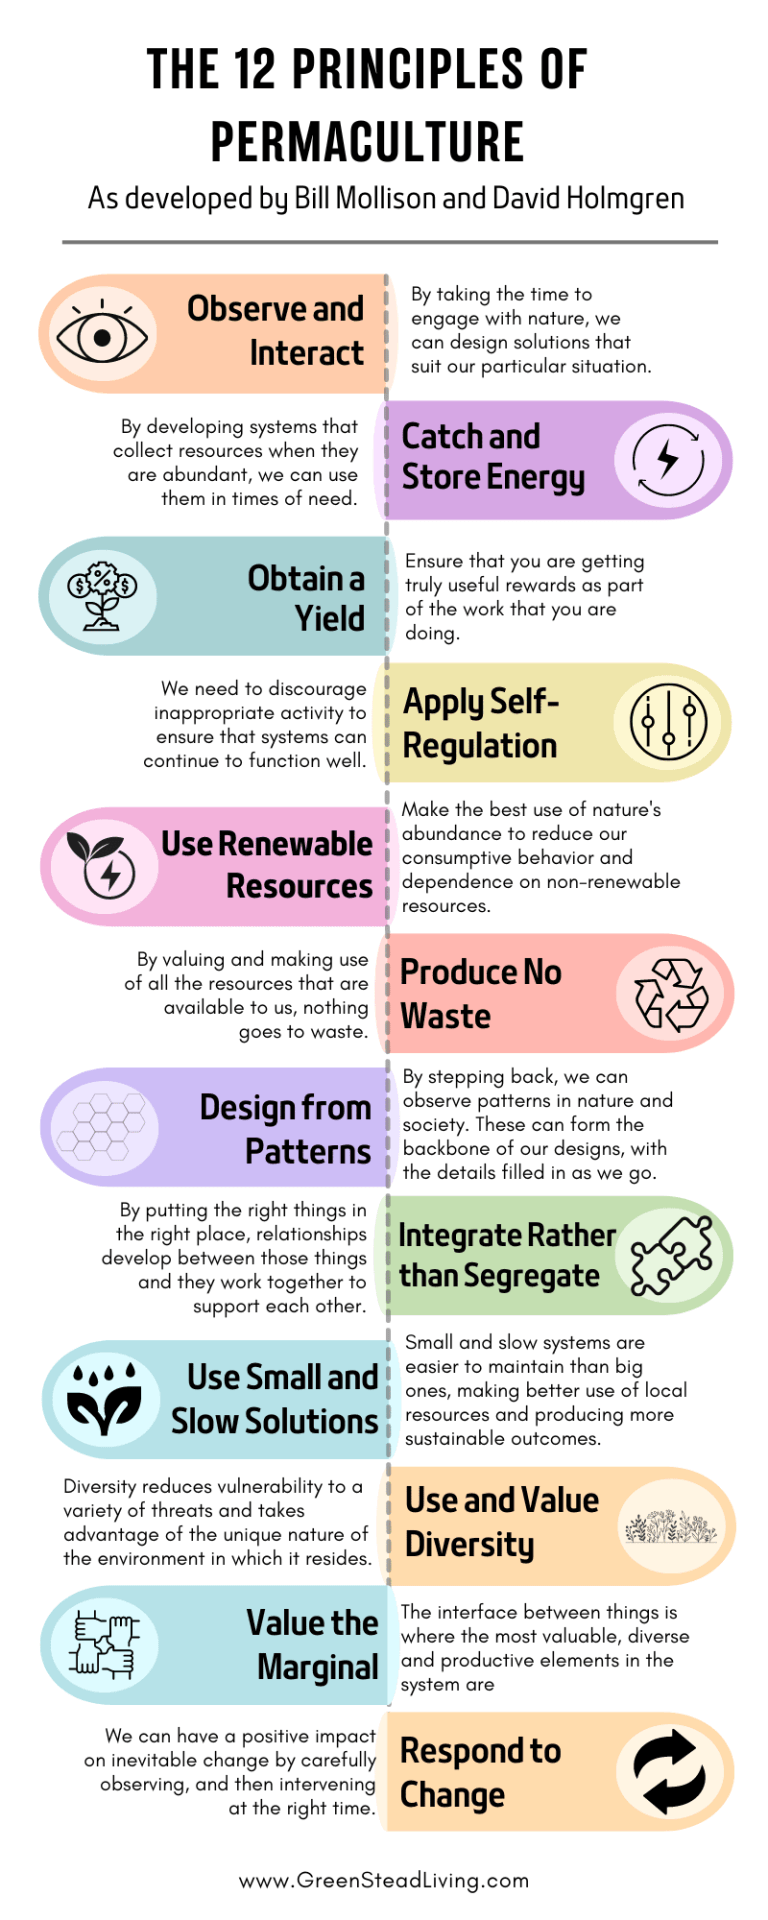
As a permaculture beginner, the 12 principles of permaculture, as outlined by one of permaculture’s co-founders, David Holmgren, provide the best framework for designing and building your permaculture garden.
Remember these principles on your journey, and when you feel stuck for choice, look back to these principles to help you make the most sustainable decision.
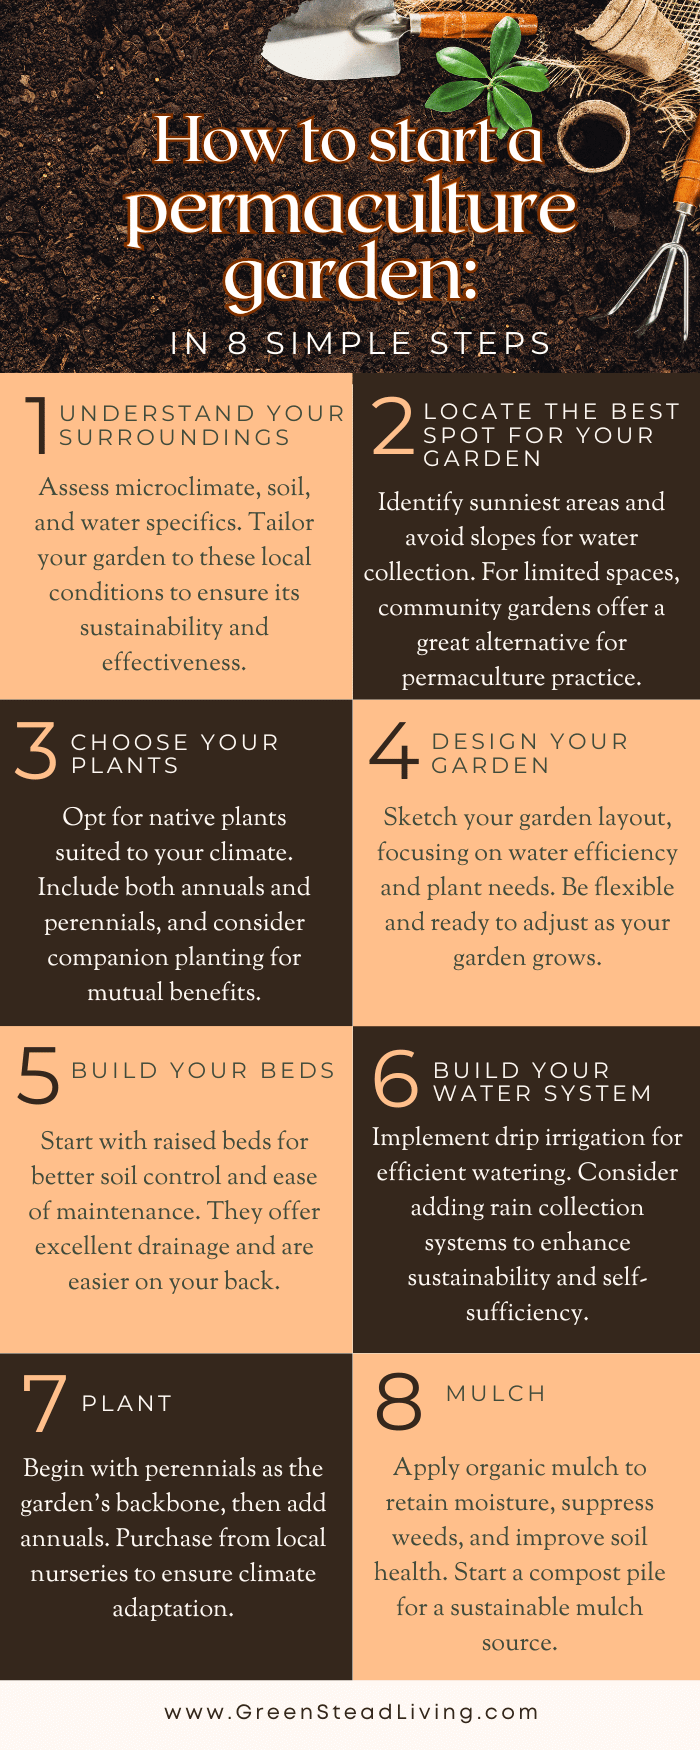
Let’s now put the theory into practice. Follow these steps to design and build your very own permaculture garden.
Since permaculture depends on the specifics of your local climate, there is no one-size-fits-all approach to permaculture gardening.
A garden in Virginia, USA, will be vastly different from a garden in Suffolk, England. In fact, a garden in Arlington in the east of Virginia will be different from Norton in the west of Virginia.
In particular, pay attention to your microclimate (such as temperature, precipitation, frost, wind, and sunlight, which can be found online), your soil conditions (type, pH level, fertility, and drainage), and your local water conditions (source, quality, as well as local water regulations).
While climate, soil, and water considerations should be at the top of your agenda, other local considerations such as biodiversity (native plants, invasive species, and wildlife) and topography (slope, elevation, and natural features) should also play a role.
A good design will save you lots of effort later on, so it’s well worth spending the time beforehand to learn the intricacies of your local climate. A poorly designed garden will be a thorn in your side for many years to come.
Be careful not to succumb to analysis paralysis; mistakes are inevitable, and even the most seasoned professionals learn new details daily. There is much to learn here, so focus on the basics and get going. Through trial and error, you will learn from your mistakes, continually improving alongside your garden.
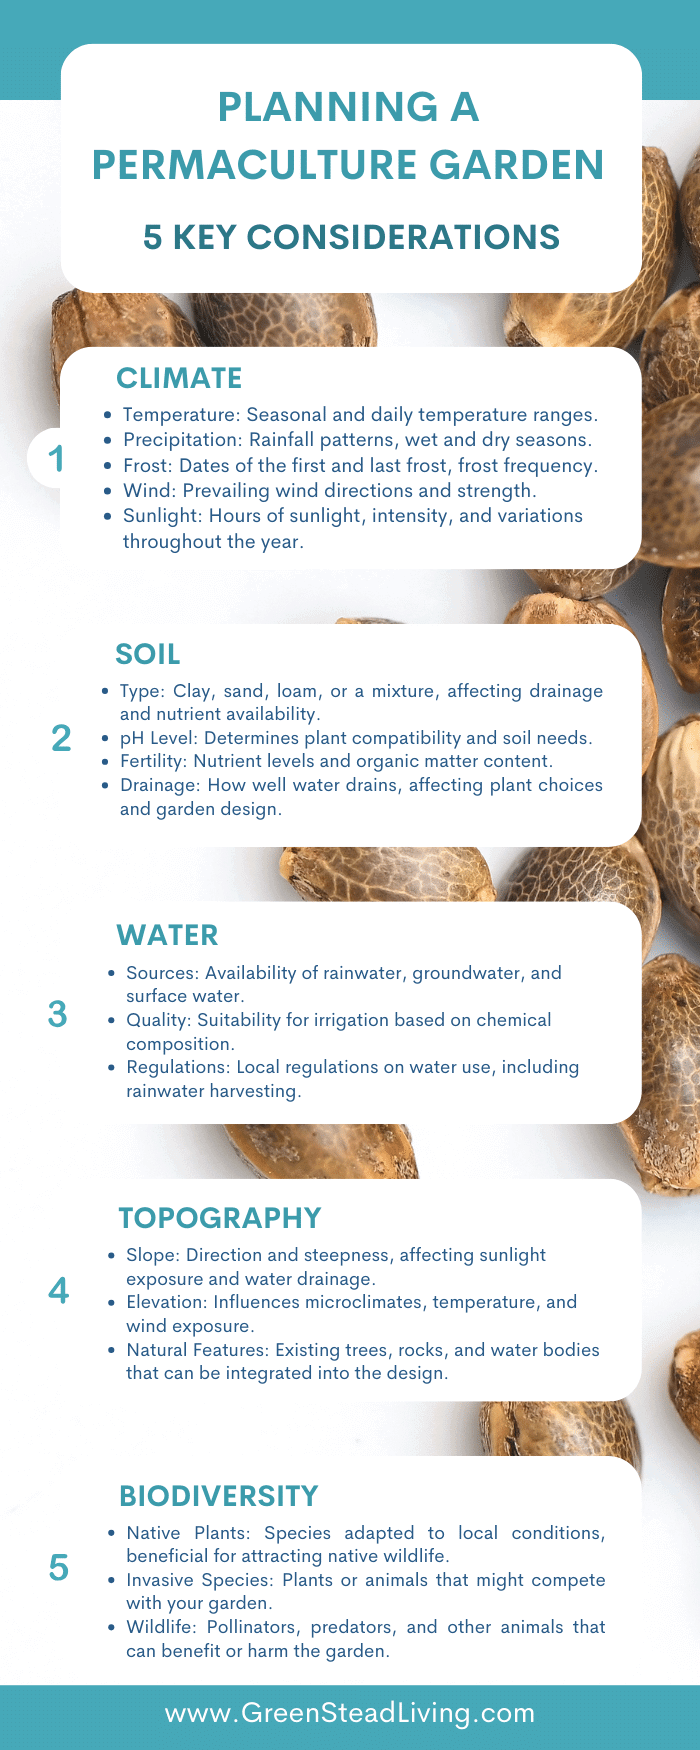
Since factors such as sunlight and water sources are vital for the prosperity of your permaculture garden, we need to maximize these by ensuring the best placement of your garden within your available space.
Observe which parts of the garden get the most sun and utilize them. Identify slopes in the landscape that could cause rainwater to pool and avoid them. If your water source is half a mile away and has to be pumped uphill, it’s probably not the best spot.
For those with smaller gardens and balconies, your choices will be limited. On the flip side, you don’t have to worry too much about your location and can get started quicker.
If you are fortunate enough to have a larger space, pick a small area that maximizes local conditions. Also, consider where you can expand further down the road.
If you have no space but still want to engage with permaculture, there are countless communities in most areas that are very welcoming and where anybody can start.
Nowadays, many large cities have begun to designate specific areas of public land for community gardening, allowing anybody the opportunity to start cultivating plants while offering a fantastic opportunity to connect with other gardening enthusiasts who probably have a wealth of experience and advice to offer.
Good permaculture practice encourages the use of both annual and perennial plants, aligning with its broader principles of sustainability, biodiversity, and creating self-sustaining ecosystems.
Picking native plants should be your main priority as they are adapted to the local conditions and tend to be more resilient and require less maintenance once established.
For example, cooler climates are better for growing apples, spinach, and carrots, whereas arid climates are better suited for figs, artichokes, and lentils. Researching the best plants for your specific region, both annual and perennial, will result in the healthiest and lowest maintenance garden.
For those looking to go the extra mile, consider companion planting and putting certain plants together where they help each other grow better.
Corns, beans, and squash are some of the most popular combinations of complementary plants – corn grows up into the air, beans can climb up the corn stalks as natural poles, and squash spreads out along the ground.
Now you have the location and components of your permaculture garden, the next step is to put it all together into its final arrangement.
Make a detailed sketch of your garden plans rather than putting it together on the fly. If your drawing skills are as bad as mine, get a satellite image from Google Maps and mark your plants and water source on there.
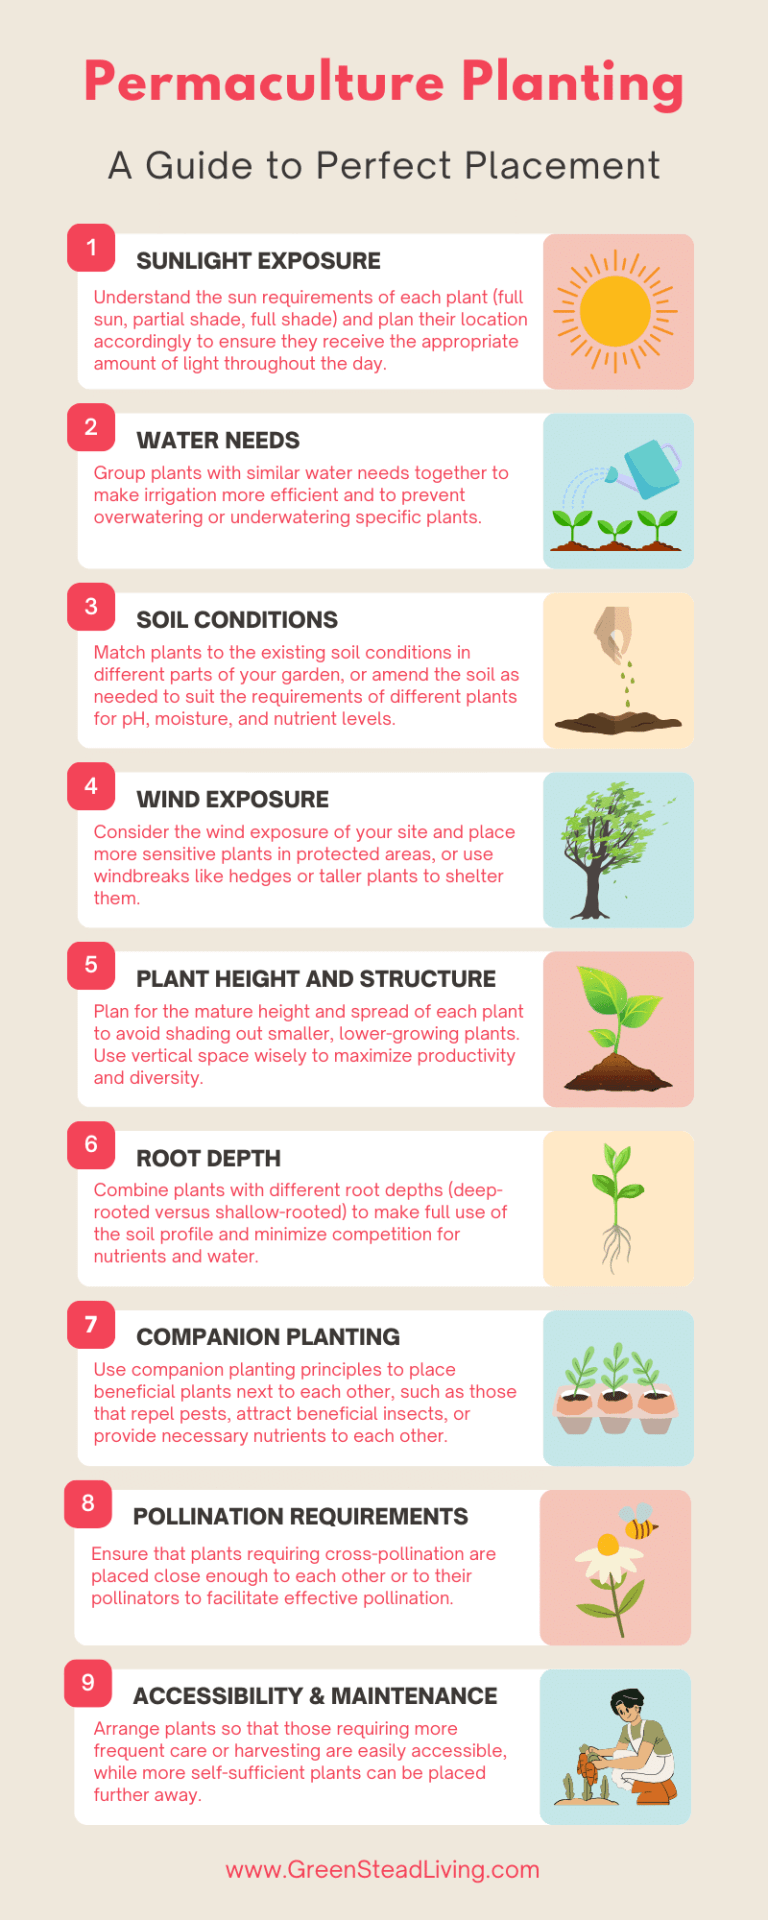
Consider grouping plants with similar water needs together to make irrigation more efficient and to prevent overwatering or underwatering specific plants. If some plants have different light requirements (full sun, partial shade, full shade), plan their location accordingly to ensure they receive the appropriate amount of light throughout the day.
If you’re in a windy area, place more sensitive plants in protected areas or use windbreaks like hedges or taller plants to shelter them.
Combine plants with different root depths (deep-rooted versus shallow-rooted) to make full use of the soil profile and minimize competition for nutrients and water.
Don’t get obsessed with the planning, however – no matter how well you plan, things will always change. Just make a start as best you can with the information you have, and be ready to adapt and overcome issues as they arise.
Finally, the planning and design phases are complete, and you can now turn to more practical affairs. It’s time to build your plant beds.
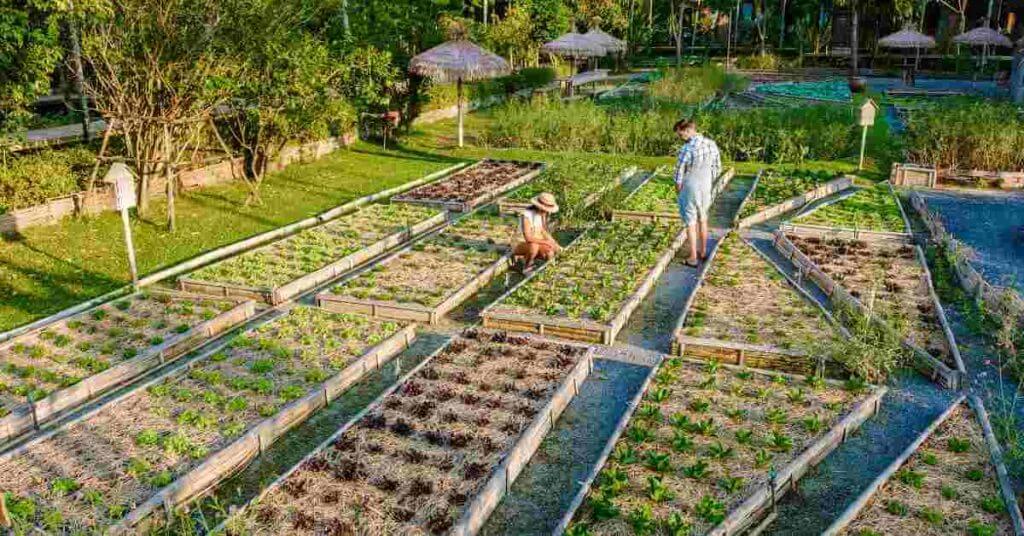
The most common form of plant bed in permaculture are raised beds, where the bed is elevated off the ground.
Raised beds offer various benefits: they provide excellent drainage, they can be filled with a custom soil mix, and are much easier on your back. They are also ideal for areas with poor native soil or hard compacted ground.
Other popular types of beds include no-dig beds, which utilize layering organic materials to promote soil while reducing labor, and Hugelkultur beds, which are built upon logs and branches under the soil, releasing nutrients slowly.
For those just starting, however, I recommend the tried and tested raised bed method, allowing you to better control and manage your soil health. They are also in keeping with permaculture principles since you don’t need to till the soil, protecting the soil microbiome while retaining moisture.
Ensuring your plants are correctly watered is vital for the overall health and success of your garden; too much water can wash away vital nutrients in the soil while too little will dry the soil out.
The most efficient method of watering your permaculture garden long-term is through drip irrigation, otherwise called soaker hoses. Drip irrigation waters plants at the bottom of the plant base as opposed to the top, ensuring as much of the water as possible is used where it counts: at the roots.
While installing a drip irrigation system may sound complicated, the fundamentals are very simple and can be performed by anyone. You can even get fancy and add timers.
Ideally, your permaculture garden should be self-sufficient with water, utilizing rain collection systems in keeping with the permaculture spirit of self-sufficiency. Once your irrigation system is set up, think about hooking it up to a greywater and rainfall collection system, such as a rain barrel.
After all the planning, it’s finally time to get our hands dirty and begin planting.
Hopefully, you now have a list of native annual and perennial plants that will work best for your specific region. Plant your perennials first as they will form the backbone of your garden, blossoming year after year.
While planting perennials from seeds is possible, certain varieties, such as asparagus or fruit trees, require several years to begin yielding produce. Transplants may therefore be a better alternative to reduce the waiting period before harvest commences.
Purchasing from a local nursery is usually best, as the plants will already be acclimated to your region’s climate, weather patterns, and soil conditions. Heirloom seeds acclimated to your local environment will also prove to hardy.
Look up the planting directions for your specific plants online, especially the suggested plant spacings. They say that well-sown is half-grown, so make sure you research the best way to plant your specific plants to avoid more work later on.
After planting the perennials, next comes the annuals. For the first few years of your new garden, you’ll want to add lots of annuals to fill the spaces while the perennials are still taking root.
Fortunately, most common vegetables are annuals, including tomatoes, peppers, cucumbers, and beans.
If you’re stuck for ideas, lettuce, radishes, spinach, beets, and zucchinis are all excellent choices for beginners as they are low-maintenance and resilient.
For those looking to maximize the efficiency of their permaculture garden, utilize the synergy of companion planting by strategically placing different plants close together for mutual benefits such as pest control, pollination enhancement, and the improvement of plant growth and flavor.
The last step, after finishing the design and planting, involves applying mulch to lock in the soil’s nutrients and moisture, ensuring they reach the root systems effectively.
Mulch is highly valued in permaculture because it mimics natural processes found in forests, where the ground is covered with decomposing organic matter. Even better, in keeping with the spirit of permaculture, it reduces the need for tilling and interrupting the soil microbiome.
Adding adequate mulch will also retain moisture, regulate the soil temperature, suppress any potential weeds, improve the soil fertility, and the decomposition will improve your soil aeration and drainage.
Select organic mulch materials like straw, wood chips, leaves, or grass clippings that decompose over time, adding organic matter to the soil.
Before applying mulch, remove weeds and water your plants thoroughly. If you’re incorporating compost, spread a layer of finished compost over the soil surface to add nutrients.
Spread a 2-4 inch layer of mulch around your plants, taking care to leave some space around the stems to prevent rot.
Ideally, you will start your own compost pile for maximum sustainability. Combine green materials (kitchen scraps, lawn clippings) with brown materials (dry leaves, straw, wood chips) in a bin or designated area.
Turn the pile regularly to aerate it and speed up the decomposition process. Once dark, crumbly, and earthy-smelling, the compost is ready to be added to your garden beds as part of your soil preparation or used as a top dressing for plants.
Just because the hard work is done, doesn’t mean you can sit back and relax. Permaculture gardening is an active pursuit and requires periodic maintenance, although the more your garden adopts the principles of permaculture, the less maintenance it will require.
Dedicate a bit of time each week for tasks like weeding. Regular attention to weeds keeps them manageable, whereas neglect can lead them to overrun your garden swiftly.
Incorporate your garden and kitchen waste into your compost. This process is low-maintenance; simply add to your compost pile over time. For those looking for an extra challenge, try to incorporate compost tea into your routine.
Keep a close eye on your garden, making necessary tweaks here and there. Patience is key; give your garden’s ecosystem time to flourish, adjusting your approach based on the success and challenges you observe.
Embarking on the journey of creating a permaculture garden may initially seem daunting, but as this guide has shown, breaking the process down into manageable steps makes it accessible and deeply rewarding.
By understanding your environment, selecting the right plants, and designing with nature’s patterns in mind, you lay the groundwork for a garden that is not only sustainable but thrives with minimal intervention.
Remember, permaculture is more than just gardening; it’s a philosophy that nurtures biodiversity, promotes ecological balance, and supports the creation of self-sustaining ecosystems.
As your garden grows, so too will your knowledge and appreciation for the intricate connections within nature. With patience, observation, and a bit of effort, the dream of a productive and harmonious permaculture garden is well within reach, offering bountiful rewards for both the gardener and the environment.
Permaculture is a way of designing gardens, farms, and living spaces that work with nature rather than against it.
Whereas conventional planted gardens prioritize aesthetic or productive goals, permaculture focuses on creating sustainable, self-sufficient ecosystems by mimicking natural processes.
Permaculture is more than just gardening; it’s a philosophy that nurtures biodiversity, promotes ecological balance, and supports the creation of self-sustaining ecosystems.
Permaculture gardening is simply the act of applying the principles of permaculture, such as sustainability and self-sufficiency, to your very own garden.

Raised beds are an excellent way of gardening for healthy and plentiful fruits and vegetables. Here are the benefits and which type of raised bed might work best for you.

Reverse osmosis water filtration systems offer the best way to obtain clean and healthy tap water for drinking.
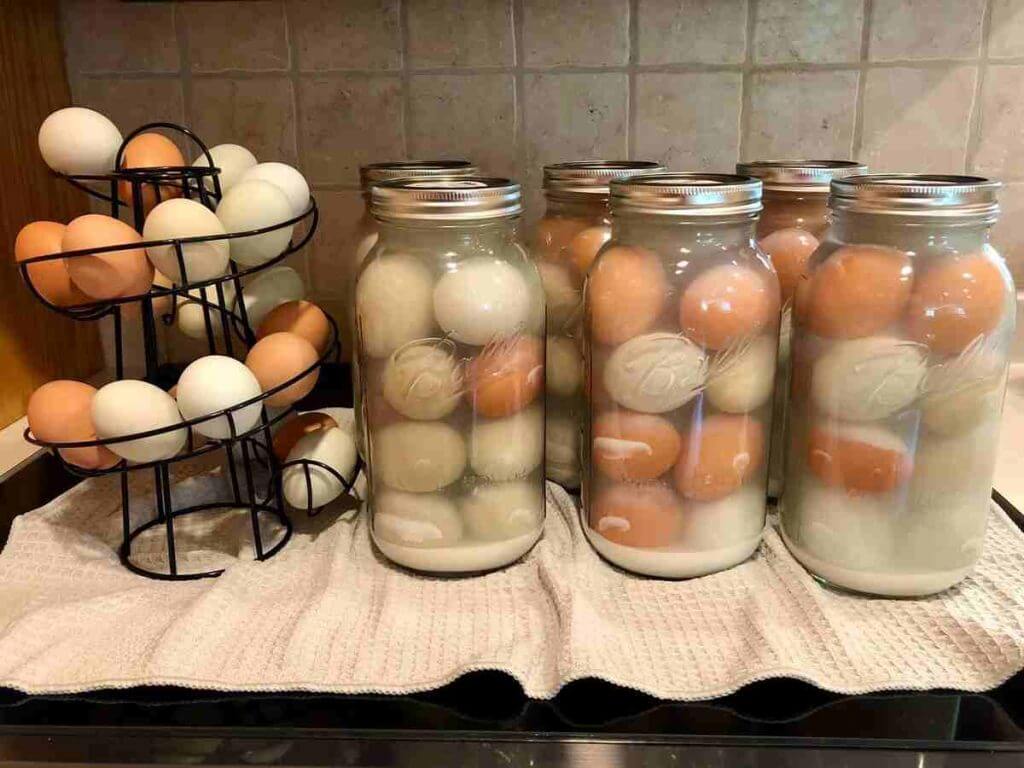
Learn how to preserve eggs for long term use, using the age-old technique of water glassing.
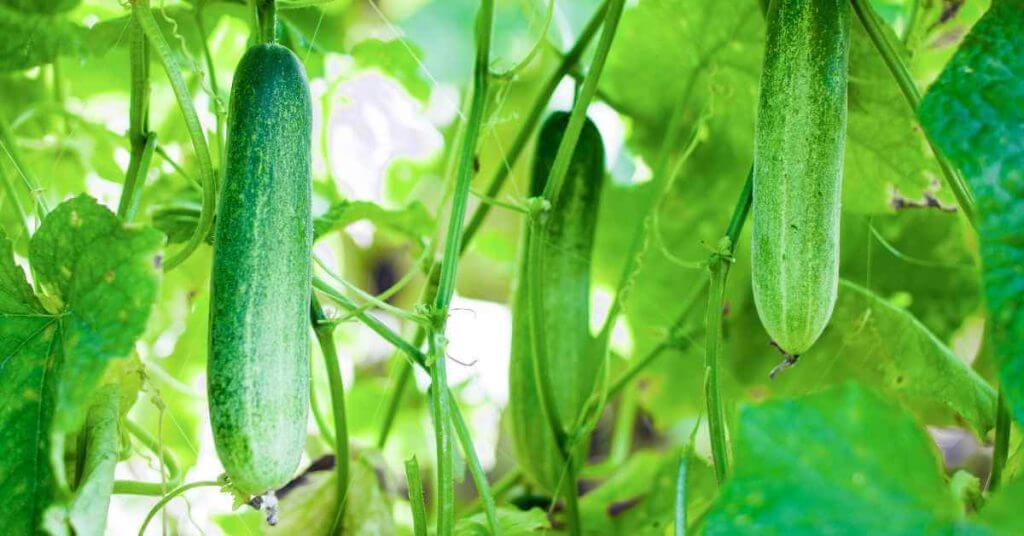
Here is a list of the 5 best companion plants for cucumbers that will help your cucumbers, and your garden as a whole, thrive.
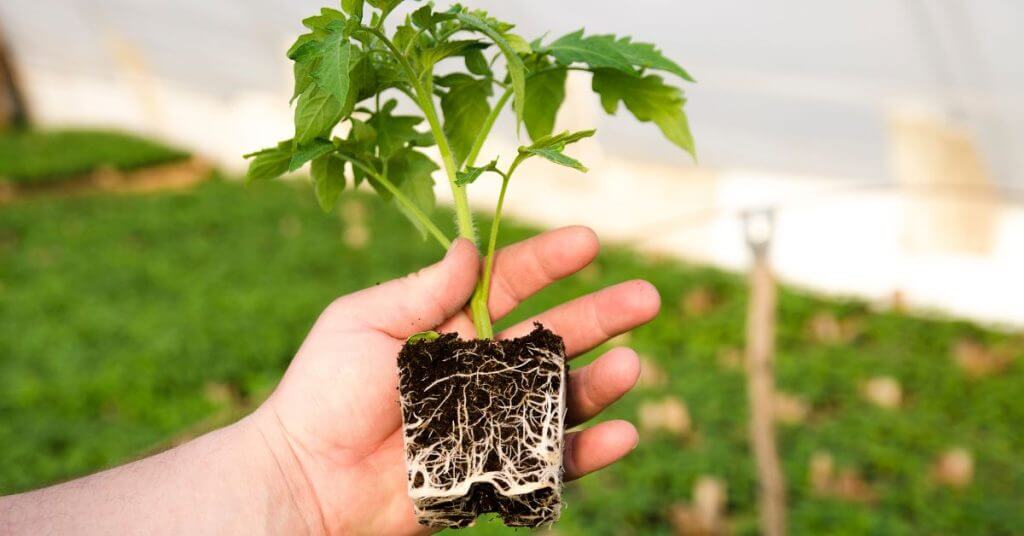
Learn how to grow tomatoes from seed by starting indoors, transplanting carefully, and providing ample sunlight and water for best results.

A guide to Silkie chickens and everything you need to know about the breed before you buy.