Raised Bed Gardening – The Best Way To Grow Vegetables
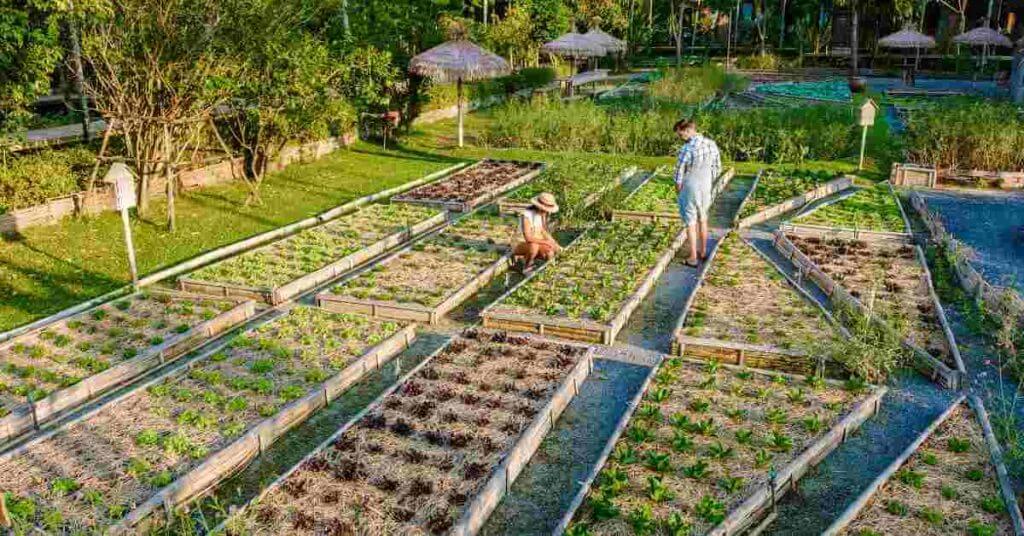
Raised beds are an excellent way of gardening for healthy and plentiful fruits and vegetables. Here are the benefits and which type of raised bed might work best for you.

Tomatoes are one of the most popular yet misunderstood plants to grow. While they are resilient and can survive in suboptimal conditions, getting them to thrive requires a fair bit of knowledge and preparation.
Fortunately, you don’t need extreme voodoo or blood sacrifices to make this happen (despite what many amateur gardeners might say). With a bit of knowledge ahead of planting, and by choosing the best tomato varieties for your climate, healthy, tasty, and productive tomato plants are within any gardener’s grasp.
This article will overview the basics of how to grow tomatoes from seeds or transplants to full harvest. More importantly, we will overview the most common and easily avoidable pitfalls made by most new gardeners (yes, I’ve made most of these mistakes myself).
With a little preparation and insight, tasty and vibrant tomatoes may be just a few warm months away.

Successfully growing tomatoes is determined in part before you even step foot in your garden. You may have the best climate, sun exposure, and watering schedule, but if your tomato varieties are not suited to your climate, they will never get the opportunity to flourish.
Tomatoes fall into two broad categories – determinate and indeterminate tomatoes.
Determinate tomatoes, also known as bush varieties, grow in a bush-like manner, reaching about two to three feet in height. They typically produce ripe tomatoes simultaneously and often cease growing once they have set fruit. These varieties tend to have a short fruiting period that occurs earlier in the growing season.
Due to their bush-like nature and shorter growing period, determinate tomatoes do not require staking or caging and are ideal for containers and smaller spaces. They are also a great choice for cooler climates with shorter growing seasons.
Some of the most popular determinate tomatoes include Roma, Celebrity, Patio, Bush Early Girl, San Marzano, Mountain Pride, Rutgers, and Marglobe. Because these tomatoes tend to ripen at the same time, determinate tomatoes in general are an excellent choice for canning.
Indeterminate tomatoes are known as vining varieties and produce larger types of slicing tomatoes throughout the mid and late-growing season, as opposed to ripening all at once.
They will continue to set fruit until the first frost occurs, after which the plant will begin to wilt and die and its season is over. How productive your indeterminate tomatoes will be depends on your growing climate: zones 3-4 can expect shorter growing seasons of around 90-120 days, while longer growing seasons such as in zones 7 and 8 can expect approximately 150-180 days.
Due to their continual growth, indeterminate tomatoes grow much taller, generally between 6 and 12 feet, and require staking. Their large size makes them better suited to large gardens, and their growth and fruit quality are often inhibited if used as container plants.
The most common varieties of indeterminate tomatoes include Beefsteak, Brandywine, Cherry, Sungold, Better Boy, and Big Boys.

For beginners looking to ease their way into the world of tomato plants, I recommend planting at least one or two high-producing cherry or grape tomato varieties as they are pretty tolerant and relatively easy to grow in most climates. Sun Gold and Cherry Baby are among my favorites.

Like most vegetables, you have two main methods of growing your tomatoes from seed.
Firstly, you can directly sow your tomato seeds into the ground in their final location, whether you choose a raised garden bed or container. Before you do this, you need to ensure the climate conditions meet the minimum (and ideally optimum) growing conditions for germination.
As with any seed, germination requires a consistently high enough temperature, and any surprise cold spells or frosty nights will kill germinating seeds almost immediately. General advice is to plant tomato seeds 2 to three weeks after your last frost date.
Unlike some more cold-tolerant vegetables like lettuce, which can be grown earlier and later in the season at a germination temperature of 60-70°F (15-21°C), tomatoes require a higher range of 70-84°F (21-29°C). Note that tomato seeds can germinate at temperatures as low as 50°F (10°C), but germination will be very slow and inconsistent.
For many regions, it can be difficult to ensure such high temperatures during germination, a key reason why most choose to germinate inside where these temperatures can be controlled for, and transplanted outside when they have matured and toughened a little.
As a fruit-setting plant, tomatoes thrive best under lots of sunlight, so choose a sunny spot that receives at least 6-8 hours of direct sunlight daily. Loosen the soil to at least 12 inches, but ideally 24, as the size and fruit set of tomato plants is largely dependent on how big of a root system it can grow, as this is how the plant can access the nutrients in the soil for it to yield plenty of fruit.
Thoroughly moisten the soil where you’ll plant your seeds, ensuring it is thoroughly moist but not soaking or squishy to the touch. Sow the seeds (plant two seeds in each hole to ensure a backup if one should fail) about 1/4 inch deep, spacing them 2-3 feet apart, depending on the variety. Some prefer to plant many seeds close together and thin the weaker seedlings, which can be an excellent way to ensure you grow more vigorous plants.
Keep the soil consistently moist but not soggy. Overly wet soil can easily rot the roots of newly germinated and delicate seedlings. Watering early in the morning is best to ensure as little water as possible evaporates in the sun.
Once the seedlings are a few inches tall, thin them by removing the weakest growing plants, leaving 2-3 feet between each plant. It can also be beneficial to use a balanced fertilizer or one high in phosphorus and potassium to promote strong root and fruit development, especially in poorer-quality soils.
You can mitigate for cooler temperatures if you are determined to direct sow by using heat maps (commonly PVC, silicone, or rubber), but unless you are working on a large scale, the second more popular method of transplanting will be a more efficient solution.
Transplanting involves germinating seeds in controlled conditions (such as a greenhouse indoors), and moving them to their final growing location (transplanting) in the garden once the growing conditions have reached optimal levels.
Although there is a fair bit more work involved in transplanting, it will allow you to get a head start on your tomato crops by at least 6 – 8 weeks, especially useful for zones with shorter growing seasons and where temperatures take a while to consistently reach the 18.5 – 26.5° C (65-80° F) that is optimal for setting fruit.
Of course, you can buy transplants that are already 2 feet tall and already setting fruit from a nursery, but where’s the fun in that?
Unless you’re living in warmer zones with long growing seasons, I would almost always recommend transplanting tomatoes. Even in temperate zone 8b where I live, those extra few weeks of growth really make the difference with the more productive indeterminate varieties.
Transplanting tomatoes is similar to transplanting most other crops. First, you need to germinate the seeds in sterile, well-draining seed starting (potting mix). You can readily and inexpensively purchase this from most grocery and gardening stores.
Grab a seedling (module) tray and fill it with your seed starting mix. You can use any sized seedling tray, but tomatoes grow deep roots fairly quickly, and so smaller trays will need to be moved to a larger pot more quickly.

Similarly to direct sowing, place a seed in each module about ¼ inch deep and cover lightly with soil. Lightly mist the surface with soil to ensure the seed remains constantly moist throughout germination.
After a couple of weeks, depending on the size of the module tray you use, you will have to move your seedlings to a larger pot to ensure the roots have enough room to grow and not become root-bound.
As a general rule of thumb for starting, I transfer my seedlings to pots once they show their first set of true leaves. Don’t be fooled by the two seed leaves that tomatoes and most other vegetables grow – wait until you have clearly defined true leaves.

Once you are two or three weeks past your frost date, your seedlings are approximately three times the size of your pot, and the weather conditions are favorable, you are ready to transplant your tomato seedlings into their final position in the garden.
Follow the same methods for direct sowing: loosen your soil to 12-24 inches deep and generously water your soil to ensure it is fully moist at all soil layers, but not soaking wet or sodden. Tomatoes are deep-rooted and will benefit when they can pull water from the deeper levels, so give it a thorough watering before planting.
As a rule of thumb, aim to plant your tomato transfer up to two-thirds the length of the plant. You’ll notice small little hairs along the stem of your tomato seedlings which will grow into roots if you bury them, helping the plant to develop a strong and deep network much faster.

To do this, you’ll need to cut off your seed leaves and one or two levels of the lowest leaves. It may seem too much, but your tomato plants will soon grow taller and compensate for these removals.

Once transplanted to the correct depth, bang in a stake next to the plant and tie the plant to the stake every 6 inches (15 cm) to support the plant and allow it to grow upwards. Tomato plants can quickly become very heavy, and if not supported correctly from a young age, will soon lean over and quite likely break a stem.
You may think the hard work is done now your healthy transplants are in the ground having got a head start on the season. But the work is only just beginning. Unlike other vegetables, especially leafy greens, tomatoes require a fair bit of oversight to ensure they remain at their most productive.
Since you only have so much time for your plants to set and harvest before the first frost date in the fall, you’ll want to manage how much time and energy your tomato plants divert into new growth and leaf production instead of ripening the fruit it is already developing.
To do this, regularly remove the smallest and weakest-looking fruit. It may seem counterintuitive, but by sacrificing a few weaker fruits now, we allow the plant to divert more energy into ripening more developed ones and become more productive overall.
Regularly remove suckers (side shoots) that sprout during the prime growing weeks of July and August. You’ll recognize these suckers as little shoots at a 45-degree angle between the main stem and a branch.
Also, continue to remove any small and weak tomatoes or flowers and side shoots as they are too late to fully ripen and will suck energy away from your larger ready-to-ripen fruit.

If you notice these suckers snap off easily, it’s a good indication that they were not doing much and were ready to go.
Removing those leaves closest to the soil also means less watering is required and lower chances of blight, which loves to infect wet and soiled leaves close to the ground.
For those in zone 8 like me, you’ll want to cut the top off your tomato plants in late July (or the last month of your growing season) to stop the plant from using energy to grow new leaves and flowers that won’t have time to fruit. By removing these new leaves, we redirect the plant to use its available energy on the remaining tomatoes that still need to ripen.
Watering correctly will also prove essential in how well your tomato plants set fruit. While tomatoes are heavy feeders and require lots of moisture in the soil, their deeper root systems allow them to keep feeding for up to a week without water.
The key is to water them frequently (I water mine moderately every 3 or 4 days), and to never allow the soil around the root system to dry out. When tomatoes get lots of water at once after having been dry for a while, they will suck up the water with a vengeance, causing the fruiting tomatoes to swell and crack.
While this is not exactly dangerous or unpalatable, it makes the fruits less presentable and increases the chances of pest contamination, ultimately shortening their shelf life. After a drought, it may be tempting to water your tomato plants extensively, but it would be better to water them just a little and gradually build up to your optimum moisture level.
Another note on watering; don’t overdo the watering as the plants come to the end of their lives, such as in the final month before the frost hits, as it will delay ripening. Once a week should be enough for this final stage of life.
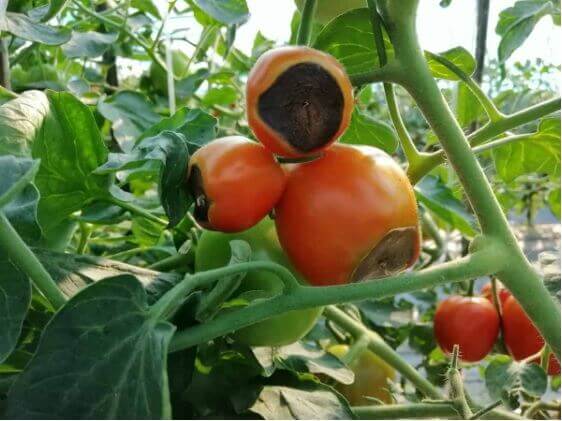
Any seasoned tomato grower understands the curse that is blossom end rot, a common nutritional disorder in tomatoes and other fruits, characterized by a dark, sunken spot at the blossom end, caused by calcium deficiency and irregular watering.
The root cause of this deficiency is a lack of water movement in the dry soil, which makes it difficult for calcium in the soil to migrate its way through the roots and into the plant.
Blossom end rot can best be avoided by ensuring your plant gets enough calcium. While most advise fertilizing the soil by adding bone meal or some other calcium-rich supplement before planting, most calcium deficiencies are caused by a lack of water allowing the transportation of calcium from the soil into the plant. Hence, watering is as important as fertilizing in ensuring sufficient calcium supply.
but be careful not to oversupply calcium either as too much can destroy the natural symbiotic mycorrhizal fungi that help to deliver water to the plant. If you have good quality healthy soil, you shouldn’t need to fertilize beyond your regular compost.
If all goes well, and the weather cooperates, you should have healthy and abundant tomatoes ripening towards the end of the growing season.
Depending on the variety, tomatoes can take 60 days to more than 100 days to harvest. You’ll know the fruit is ready to harvest as it will begin to change color, what is known as the breaking stage.
Ideally, you’d pick your tomatoes once the color change is complete and the tomato has fully ripened. The problem is every other creature in and around your garden knows this too.
To avoid the problem of pests picking off your ripened tomatoes, I prefer to harvest at the breaking stage phase, where the color has just changed. Why it may seem too early to harvest, tomatoes ripen from the inside out and so are usually already somewhat ripened by the time they break stage.
If you allow the tomatoes a few days to ripen indoors where they are safe, they will fully mature. This also reduces the strain on the plant, allowing it to focus its energy on ripening the remaining fruit.

If space is limited, it is perfectly viable to grow tomatoes in containers in much the same way, although there are a few considerations you need to account for.
Firstly, don’t underestimate the size of the pot or container you will need. I would recommend a 5-gallon container at a minimum, anything less and your root system will be restricted, inhibiting the plant’s full potential.
You’ll also need a high-quality, well-draining potting mix enriched with compost or a slow-release fertilizer. Maintain consistent moisture by watering regularly, as containers dry out faster than garden beds, and ensure the container has drainage holes to prevent waterlogging.
Due to their smaller, more bush-like nature, determinate types, such as Patio Princess, Tiny Tim, or Bush Early Girl, and many cherry tomato types are a popular and successfully grown choice.

While tomatoes are a resilient and fairly forgiving plant, to truly thrive, you need to provide some specific conditions and care.
It all starts with selecting the right tomato varieties. While Black Krims may look exciting to grow, they will prove to be nothing more than expensive fertilizer if your climate won’t support them.
Timing is key – their long growing seasons make getting a head start on transplanting ahead of the last frost date imperative. For those lucky enough to live in warmer and longer growing seasons, directly sowing your seeds is just as productive.
Plant your transplants deep by removing the seed leaves and the first few branches below the fruit line. Bury two-thirds of the stem for extra root development.
Energy management is the secret of growing bountiful harvests, so maximize your plant’s energy directed to ripening existing fruit by trimming off suckers as they appear, and removing any small and weak-looking fruit that won’t have time to harvest.
Don’t forget to water regularly and avoid any periods of drought that can make the fruit split and bring on the dreaded blossom end rot.
A bit of preparation and the right knowledge will make all the difference between a mediocre crop and a bumper harvest.
Depending on the variety, tomatoes can take 60 days to more than 100 days to harvest. You’ll know the fruit is ready to harvest as it will begin to change color, what is known as the breaking stage.
As a rule of thumb, plant your tomato seeds 6-8 weeks before your last frost date indoors or in a greenhouse, and transplant your seedlings 2-3 weeks after the last frost date.
Plant your transplants deep by removing the seed leaves and the first few branches below the fruit line. Bury two thirds of the stem for extra root development.
Raised beds are an excellent way of gardening for healthy and plentiful fruits and vegetables. Here are the benefits and which type of raised bed might work best for you.
Learn how to grow tomatoes from seed by starting indoors, transplanting carefully, and providing ample sunlight and water for best results.

Although still experimental, the benefits of grounding have been demonstrated in an increasing number of studies.
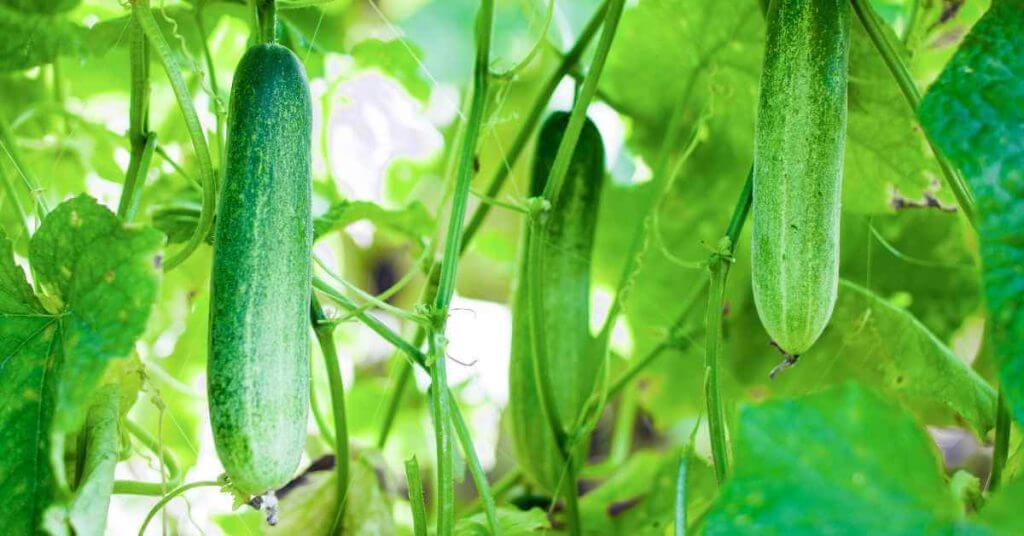
Here is a list of the 5 best companion plants for cucumbers that will help your cucumbers, and your garden as a whole, thrive.

Reverse osmosis water filtration systems offer the best way to obtain clean and healthy tap water for drinking.
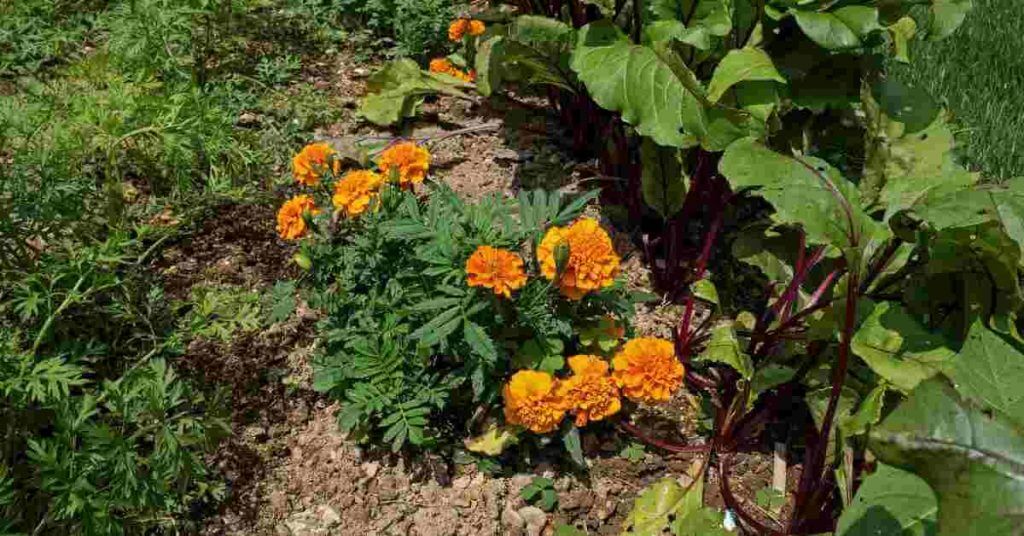
Looking for which plants are best for companion planting with flowers? This article contains a table with the best flowers and their many benefits.